Before You Begin • Safety Information • Recommended Tools • Setting Up the Rack • Removing the Rack From the Pallet • Positioning the Rack • Removing the Doors From the Rack • Installing the Stabilizer • Removing or Installing a Side Panel
Before setting up the rack, review the site requirements outlined in the Dell PowerEdge 24U Rack Site Planning Guide and complete any necessary preparations.
Carefully read the following safety information before you begin setting up the rack.
| WARNING: Installing components in the rack without the front stabilizer installed could allow the rack to tip over and cause bodily injury under certain circumstances. Always install the stabilizer before installing components in the rack. |
The stabilizer helps prevent the possibility of the rack tipping over when a component is installed and then pulled out of the rack to the fully extended position of the slide assemblies. For instructions on installing the stabilizer, refer to Installing the Stabilizer.
To set up the rack, you should have the following tools:
You must perform the following tasks to set up the rack:
The sections that follow include instructions for performing these tasks.
Perform the following steps to remove the rack from the pallet.
| WARNING: To prevent personal injury due to the size and weight of the rack, have at least two people move the rack. |
Figure 1. Removing the Rack From the Pallet
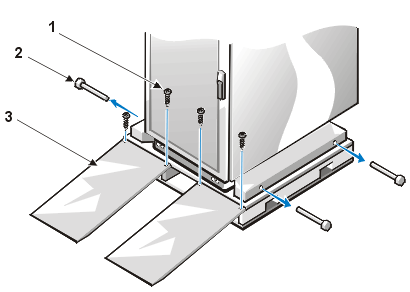
1 |
screws (4) |
2 |
bolts (4) |
3 |
ramps (2) |
When positioning the rack, allow the following minimum clearances:
Before installing the equipment in the rack, you may wish to remove the doors from the rack to improve access to the interior of the rack and to prevent damage to the doors. Perform the following steps to remove the doors.
| WARNING: To prevent personal injury due to the size and weight of the doors, never attempt to remove or replace the doors by yourself. |
Figure 2. Opening the Latch on the
Door

If you wish to reverse the door so that the handle is on the other side, perform the following steps:
Figure 3. Removing the Doors
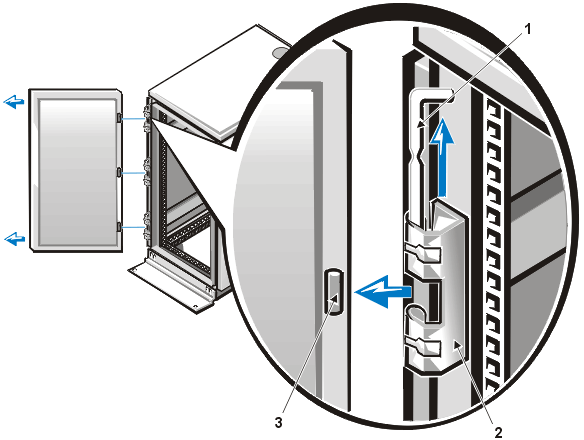
1 |
hinge pin |
2 |
hinge |
3 |
hinge insert |
For safety reasons, you should install the stabilizer on the rack by performing the following steps:
| NOTE: Install front stabilizers on a stand-alone rack. |
Figure 4. Installing the Stabilizer
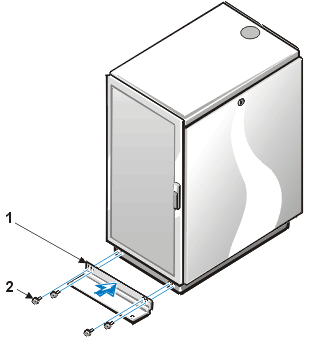
1 |
stabilizer (1) |
2 |
screws (4) |
You may need to remove a side panel from a rack to gain access to the rack's interior. Perform the following steps to remove a side panel from the rack.
| WARNING: To prevent personal injury due to the size and weight of the side panel, be careful when removing or replacing the side panels by yourself. |
Figure 5. Removing the Side Panels
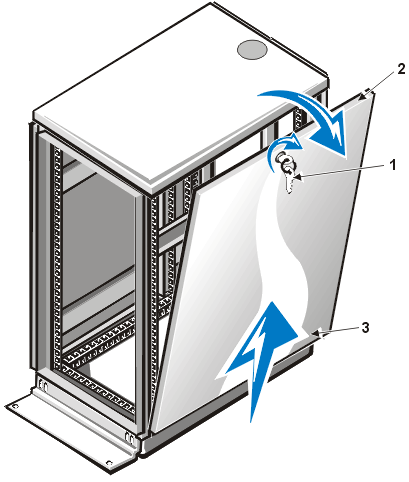
1 |
lock |
2 |
top of side panel |
3 |
bottom of side panel |
To replace the panels, reverse the process.