
|
FECO: |
BC#16 |
|
PRODUCT: |
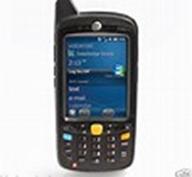
Zebra MC67NA |
|
PRODUCT WEB SITE: |
|
|
RELEASE DATE: |
6th February 2018 |
|
ESTIMATED MAN HOURS: |
1 (+ 24hr to
charge battery) |
|
CLASS OF CHANGE: |
INTRODUCTION |
|
REASON FOR CHANGE: |
New device |
|
RELATED FECO/AB: |
|
Zebra MC67NA Configuration and Software Installation Instructions
Prerequisites
Y PPT Barcoding Scanner Software R2_2_3 or later (from Neil Wadsworth)
Y POD Software Version R1_2_1 or later (Proof-Of-Delivery Software CD from Neil Wadsworth)
Y EDP Scanner Companion CD (From Neil Wadsworth) Containing: -
o Microsoft Mobile Device Centre (on Companion CD)
o Java Crème plus V 4.12 CAB file (on Companion CD)
o env.properties file for BAR software (on Companion CD)
o upgrade software for MC67NA including Fusion (Wireless Companion) (on Companion CD)
o Java Crème Plus License file (on Companion CD)
Y Zebra MC67NA, cradle and quick start guide (on Companion CD)
This document refers to the installation on a Zebra
MC67NA running Windows Mobile 6.5. Refer to F.E.C.O.s
BC#11 and BC#13 for the PPT88** and MC70** devices.
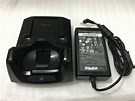
Physical Device
· Similar in style to previous models but seems more rugged
- Accessories include hard holster, soft holster, spare batteries
- Cradle unit is different to previous models, you can still charge a spare battery on it
Configuration
1. Mobile Device Settings
- Refer to the
MC67NA ‘Quick Start Guide’ for details of how to fit and charge the
battery (24 Hours)
- Power On the
device
- Follow the
instructions displayed to complete the screen alignment settings
- Go to
- Start
- Settings
On desktop
Select “Wireless Companion” (Fusion, logo with F)
· You need to add a profile, so select ‘Find WLANs’
· Hold the stylus on the connection that you wish to set up, Add profile
1. Wireless LAN Profile Entry, Leave Profile Name as is, Next
2. Operating Mode, leave as Infrastructure, Next
3. Security Mode, leave as WPA2 – Personal, Next
4. Fast Roaming Options, leave as Allow Symbol HFSR, Next
5. Encryption, leave as AES, tick Pass Phrase, untick Mask characters
6. Key – enter wireless key, Next
7. IPv4 Address Type, leave as is, Next
8. Battery Usage Mode, leave as Fast Power Save, Next
9. Performance Settings, leave as Optimize for Data, Save
·
Tick
Options
·
Go
to dropdown Regulatory
·
Change
Country to UK, untick Enable 802.11d, Save
· Select “OK” to close the window
Settings
System
Select “About”
Device ID tab
· Change the “Device name” and “Description” as required
· Select “OK” to close the window
Select “Backlight”
Battery Power tab
·
Set
the time to “2 minutes”
·
Check
the box to “Enable backlight when a button is pressed or the screen is
tapped”
External Power tab
·
Check
the box to “Enable backlight when a button is pressed or the screen is
tapped”
· Select “OK” to close the window
Select “Power”
Advanced tab
·
Set
the “On battery power” time to “3 minutes”
· Leave “On external power” unchecked
· Select “OK” to close the window
Select “Regional Settings”
Region tab
·
Set
your locale to “English (United Kingdom)”
· Select “OK” to close the window
· Select “OK” to close the restart warning window
·
Arrow
back
Select “Clock & Alarms”
· Set Time Zone to “GMT London,Dublin”
·
Set
the correct time
·
Set
the correct date
· Select “OK” to close the window
· Select “Yes” to confirm the changes
- Exit the
Settings screens
- Soft reset the device by pressing and holding the power button for 8 seconds
2. Install Microsoft Mobile Device Centre and Connect to the Mobile Device
On the Host PC Insert the Scanner Companion CD into the CD drive. Browse to the Windows Mobile Device Centre directory on the CD and run the appropriate “drvupdate-xxx.exe” for your PC
Select
next to continue, agree to the terms of the licence agreement and enter the
username and organisation in the customer info. Accept the default installation
path of “C:\Program Files\Windows Mobile Device Centre”, select next and then
install.
Once
the installation has finished the “Get Connected”
screen is displayed
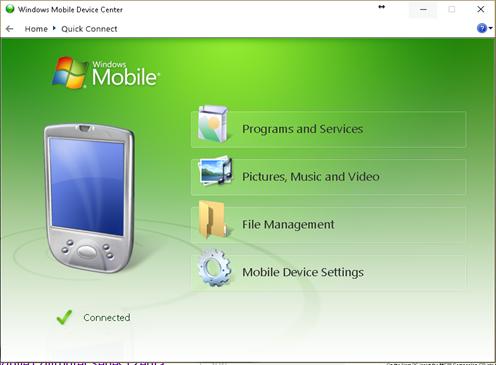
Dock
the device in the cradle as instructed.
It should just automatically start ‘Connecting’ and open the above screen
3. Copy the Java Crème Plus CAB file to the device
Java Crème Plus (version 4.12) is an application run time required by the Zebra series scanners running Windows mobile 6.5 that will allow the EDP PPT Scanner Software to operate.
The Crème plus CAB file is on the Scanner Companion CD).
EDP has purchased a number of Licences from NSICOM to be used with the Java Software; this is on the Scanner Companion CD, when used, advise Neil Wadsworth of how many licences used and customer.
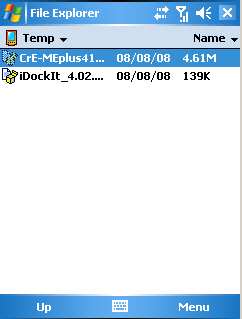
Copy
the Java Crème Plus CAB file to the device: -
- Run File Management within Windows Mobile Device Centre on the host PC
- Click “Browse the contents of your device”
- Open the “Temp” directory
- On the Host PC Insert the Scanner Companion CD into the CD drive. Browse to the Crème Plus directory and copy the CAB file (right click + Copy) then paste it into the Temp directory within Windows Mobile Device Centre Explorer (right click + Paste)
- A file conversion warning may appear - Select “OK” to continue copying the file
- Exit the Windows Mobile Device Centre and the CD-ROM Explorer windows
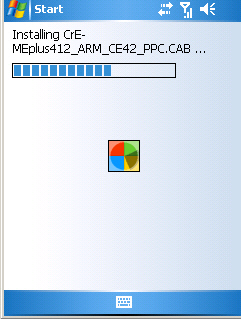
4. Install the Java Crème Plus application
- Remove the
device from the cradle and go to
- Start
Select “File Explorer”
·
Browse
to “My Device”, “Temp”
· Select the “CrE-MEplus…CAB” file to run the installation
|
|
|
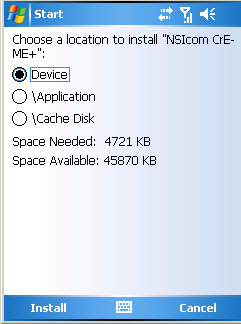
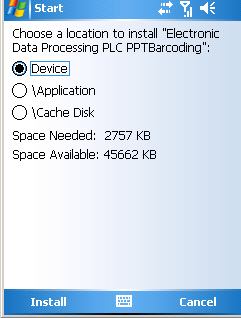
·
At
the “Choose a location prompt” leave “Device” selected and Select
“Install”
|
|
|
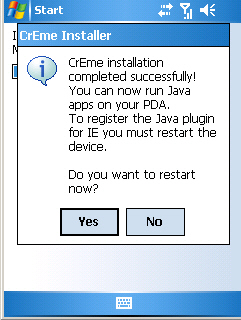
·
At
the restart prompt select “Yes”
5. License Crème Plus
A Crème Plus licence file is required for each Mobile Device and is on the Scanner Companion CD
Copy
the Java Crème Plus License.dll to the device: -
- Dock the device
in its cradle
- Run File Management within Windows Mobile Device Centre on the host PC
- Click “Browse the contents of your device”
- Open the “Windows” directory
- Copy the DLL
file (right click + Copy) then paste it into the Windows directory within
Windows Mobile Device Centre Explorer (right click + Paste)
- A file conversion warning may appear - Select “OK” to continue copying the file
Exit
the Windows Mobile Device Centre Explorer window
6. Load the EDP PPT Bar Coding Software
- Ensure the EDP PPT Bar coding application “PPT
Barcoding” has been removed from the host PC
(Add/Remove Programs)
- Dock the device
in its cradle
- On the Host PC insert the Symbol PPT Software CD into the CD drive. Browse to the MC70 directory and run “Setup.exe”
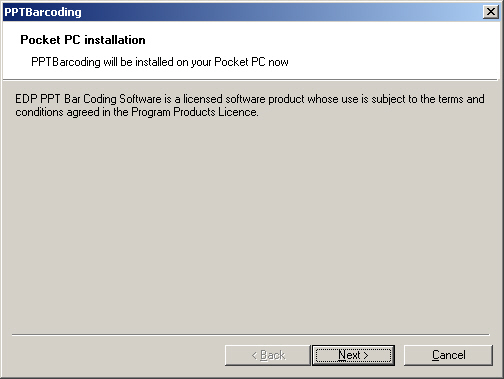
- Select “Next” to continue
- Check the button to accept the terms in the license agreement and select “Finish”

- Select “OK” at the “Application Downloading Complete” window
The
installation will then continue on the device
|
|
|
- At the “Choose
a location prompt” leave “Device” selected and Select “Install”
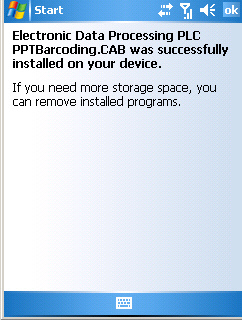
- Select “OK” to close the “successfully installed” window
- Remove the
device from the cradle
- Soft reset the
device by pressing and holding the power button for 8 seconds
7. Create Default Bar Coding Files & Folders
Run
PPT Barcoding on the Mobile
Device to create the default bar coding properties file and bar coding
directory structure: -
- On the device go
to
- Start
Select “PPT Barcoding” (If the device hangs perform a soft reset and run again).
|
|
|
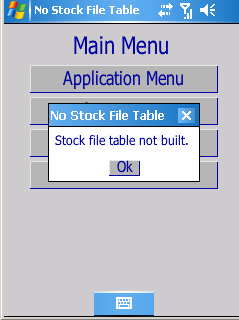
· Select “Ok” to close the “No Stock file Table” warning
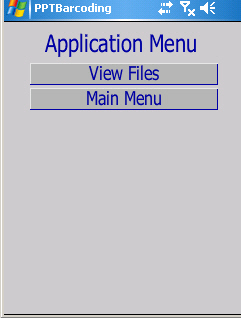
·
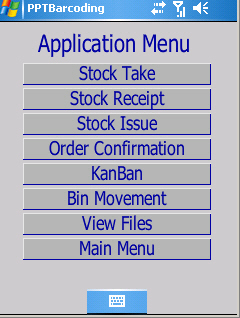
Select
“Application Menu”
|
|
|
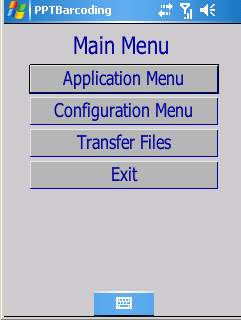
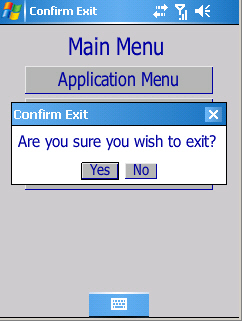
· Return to the “Main Menu” and “Exit”
· Select “Yes” to confirm
8. Load the Full Bar Coding Properties file to the Mobile Device
- Dock the device
in its cradle
- On the Host PC Insert the MC70 Companion CD into the CD drive. Copy the properties file “env.properties” (right click + Copy)
- Run File Management within Windows Mobile Device Centre on the host PC
- Click “Browse the contents of your device”
- Double click “Program Files”
- Double click “QuantumVS”
- Double click “PPTBarcoding”
- Double click “.barcodedata”
- Double click “pJSCP”
- Double click “barcodedata”
- Paste the new env.properties file to the barcodedata directory within Windows Mobile Device Centre Explorer (right click + Paste)
- A file conversion warning may appear - Select “OK” to continue copying the file
- The properties file “env.properties” will already exist on the Mobile Device. Overwrite this with the new file
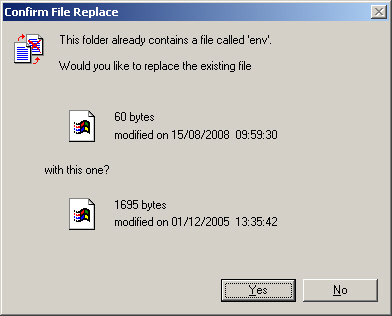
- Select “Yes” to confirm the file replacement
- Close the
ActiveSync Explorer window
- Re-run the PPT Bar Coding Application to check the full “Application Menu” is displayed
|
|
|

- Return to the “Main Menu” and exit
9. Load the EDP PPT Proof Of Delivery Software
- Ensure the EDP POD Bar Coding application “pod” has been removed from the host PC (Add/Remove Programs).
- Dock the device
in its cradle
- Insert the Proof-Of-Delivery Software CD into the CDROM and go to the CDROM Directory on the Host PC, browse to the MC70 directory and run “Setup.exe”
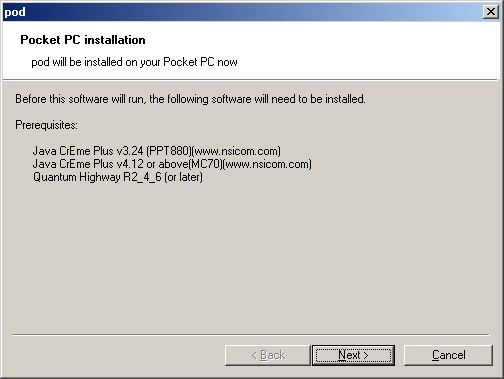
- Select “Next” to continue
- Check the button to accept the terms in the license agreement and select “Finish”
- Select “OK” at the “Application Downloading Complete” window
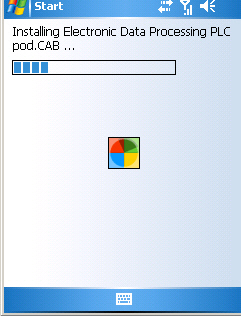
The
installation will then continue on the device
|
|
|
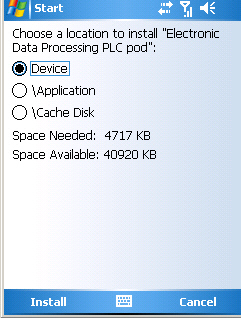
- At the “Choose
a location prompt” leave “Device” selected and Select “Install”
- Select “OK” to close the “successfully installed” window
10. Create Default POD Files & Folders
Run
POD on the Mobile Device to create the default proof of delivery properties
file and POD directory structure.
- Remove the
device from the cradle and go to
- Start
Select “Pod”
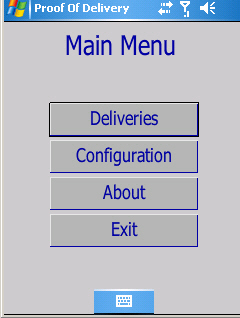
· Select “Exit” at the Main Menu
·
Exit
Programs
11. Soft Reboot the Mobile Device
Reboot
the scanner to check the persistence of the applications
·
Press
and hold the power button for 8 seconds
·
Run the POD and PPT Barcoding
applications from the start menu
12. Testing a network connection, setting up wireless, see Configuration in section 1
The Fusion app needs upgrading to latest version
Open WMDC, copy the file FUSION_X_2.03.0.0.025R_MPA3_WM65.CAB from the Companion CD to /Temp on the scanner
Click on the .CAB file to upgrade Fusion, it will reboot afterwards
To check version, go to Wireless Companion, Wireless Status, Version
On the Home screen, if the wireless is connected, it will show the Fusion symbol with Wi-Fi: name of the network that it is connected to.
Open Internet Explorer, browse to to ensure that it is working
13. Installing 4g SIM Card
It is the customer responsibility to get a data SIM Card appropriate for the scanner, it is the largest size SIM
The SIM compartment is under the battery.
Remove the cover (can be stiff), remove the battery, using a fingernail, prise up the rubber cover
Fit the SIM Card into the holder
Replace battery and cover, reboot scanner
Test that the phone works
14. Setting up ftp to fasthosts
The first time you go into FTP Configuration it will ask for a password, just type 1
The screen will be defaulted to
- Server I.P.: blank
- Server Port Number: 21
- Server User: blank
- Server Password: blank
- Data Directory: /charisma1/data/bml
- Passive: ticked
It is the customers responsibility to set up an account with fasthosts
They then provide the username and password to ITSC, who then set up the ftp as necessary
Note – the scanners will only use ftp, not sftp, which is why fasthosts is recommended
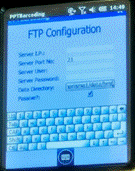
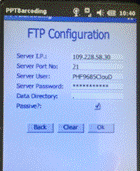
example – blank example – fasthosts, note . (dot) as Data Directory
15. Backing up
ActiveSync / Windows Mobile Device Centre no longer has a backup facility. A 3rd party application would have to purchased to perform a full backup of the device
16. Edit the POD Properties file
Once the software has been installed contact Professional Services at EDP/BML to configure the barcode scanning software
If POD is to be configured the EDP/ BML implementor will edit the pod.properties file to set the required IP address of the Quantum VS XML Highway server.
Example:
default.infoserviceproviderurl=
17. Set up Drivers Routes within POD
These are set up on the Charisma Server, name, password
Then on the device, the user logs in to retrieve their information regarding Deliveries
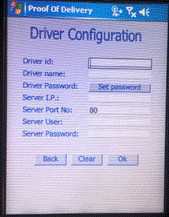
Example (Phil Holden)
Driver ID: lukes_R1
Driver Name: Luke Storer
Driver Password: lstorer (has to be entered by driver every time he accesses the Deliveries)
Server I.P.: 10.1.1.198 (this will only work from the office)
Server Port No: 80
Server User: lukes_r1 (Set up on Charisma Server)
Server Password: system (Set up on Charisma Server)