Back to Contents Page
Dell™ PowerVault™ 715N NAS Systems
Administrator's Guide
 Configuring the NAS System for the First Time
Other Documents You Might Need
This section provides information necessary to perform the initial configuration of the system.
The NAS system is a "headless" system that is managed through the network; it operates without a keyboard, monitor, or mouse. You configure and manage the NAS system with the browser-based Dell™ PowerVault™ NAS Manager, which runs on a client system on the same network. See "NAS Manager" for more information. For certain configuration tasks and for troubleshooting, you can connect the client system directly to the NAS system using the serial cable that was provided with the NAS system.
You must set the basic configuration from another system that has a keyboard, monitor, and mouse. This system is referred to as the client system. After you set the basic configuration, you can use the NAS Manager from any system on the network to set passwords, local users, shares, and so on. See "NAS Manager."
You can configure your system in several ways, depending on whether you use Dynamic Host Configuration Protocol (DHCP):
- If DHCP is installed on your network, your system automatically configures the network settings. Contact your network administrator if you do not know whether your network uses DHCP.
- If DHCP is not installed on your network, you can configure your system using a serial connection or the Dell OpenManage™ Kick-Start utility.
- Connect the power cable to the NAS system, and plug the cable into a power source.
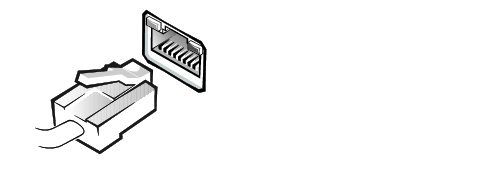
- Connect one end of an Ethernet cable (see Figure 1-1) into the port labeled "LAN 1"
on the back of your NAS system.
 |
NOTE: Your NAS system was shipped with a standard Ethernet cable and a crossover
Ethernet cable. Do not use the crossover cable. The crossover cable is used only for
reinstallation.
|
- Connect the other end of the Ethernet cable to a functioning Ethernet jack.
- Push the power button to turn on the NAS system.
|
NOTE: The NAS system takes approximately 5 minutes to boot.
|
The NAS system retrieves the information it needs (the Internet protocol (IP) address, gateway subnet mask, and domain naming system (DNS) server address) from another system on the network.
Figure 1-1. Ethernet Cable
- Verify that the LAN 1 LED on the bezel is lit.
If the LED is not lit, check to make sure that the Ethernet cable is connected and that your network connection is functioning properly.
- From a client system on the same network, open Microsoft® Internet Explorer 5.01 or
later (or for Red Hat Linux only, open Netscape Navigator 6.1 or later), type the
default system name in the URL box, and press <Enter>.
The default system name is DELLxxxxxxx, where xxxxxxx is the system's service tag number. For example, if your service tag number is 1234567, type DELL1234567. You can find the service tag number on the top cover of your NAS system.
- If you cannot connect to the system through a Web browser, set the IP address,
gateway subnet mask, and DNS server using either a serial connection or the Kick-
Start utility with DHCP on a remote system.
See "Configuring Your System Using a Serial Connection" and follow the procedure for your operating system, or see "Discovering Your System Using the Kick-Start Utility."
- Enter the default administrative user name and password for your system when
prompted, and then click OK.
|
NOTE: The default administrative user name is administrator and the default
password is powervault.
|
- Use the NAS Manager to begin setting up shares and volumes on the NAS system.
See "NAS Manager."
 |
NOTICE: If you do not use the Kick-Start utility to configure your system, you must disable the
Kick-Start utility immediately. If the Kick-Start utility is enabled, the system logs in
automatically as administrator, which creates a security risk. The Kick-Start utility also takes
up system resources by constantly checking for configuration information. For more
information, see "Disabling the Kick-Start Utility."
|
If your network does not have DHCP, you can configure your NAS system using a serial connection. You can connect to the NAS system by using a client system with one of the following operating systems:
- Microsoft Windows NT®
- Windows® 2000
- Windows XP
- Connect one end of the serial cable provided with your NAS system (see Figure 1-2) to
the serial port on the NAS system, and connect the other end to an available serial port
(typically COM1 or COM2) on a client system running Windows 2000.
Figure 1-2. Serial Cable

- Plug in the NAS system.
- Push the power button to turn on the NAS system.
|
NOTE: The NAS system takes approximately 5 minutes to boot. You should allow an
additional 5 minutes for the serial connection service on your NAS system to start.
|
- Right-click My Network Places on the desktop, and click Properties.
The Network and Dial-up Connections window appears.
- Double-click Make New Connection.
The Network Connection Wizard is displayed.
- Click Next.
- Select Connect Directly To Another Computer, and then click Next.
- Select Guest, and then click Next.
- From the Select a Device menu, select the COM port on your client system to which
you connected the serial cable, and then click Next.
The COM port is the communication port on the client system to which the serial cable connects. The COM port used on your client system is typically labeled COM1 or COM2.
- Click Only for myself, and then click Next.
- Type a name for the connection in the text box, and then click Finish.
Do not click Connect yet. The connection must be set up before connecting.
|
NOTE: It may take several minutes for the direct serial connection setup to complete.
|
- Click Properties.
- In the next window that appears, click the General tab, and then select
Communication cable between two computers in the Select a Device section.
- Click Configure.
The Modem Configuration window appears.
- Select the Maximum Speed (bps) menu, and then click 115200.
- Verify that only Enable hardware flow control is selected.
- Click OK to close the Modem Configuration window.
- Click OK to close the connection window.
The Connect box prompts you for a user name and password.
|
NOTE: The default administrative user name is administrator and the default
password is powervault.
|
- Ensure that your NAS system is on and that it has had sufficient time to boot into the
Windows operating system.
- Start a Web browser on the client system you are using to configure the NAS system.
- Type https://192.168.192.1:1279 in the browser and press <Enter>.
192.168.192.1 is the IP address used by your NAS system for this serial cable connection.
- Click Yes to accept the security certificate.
If a message states that the name on the security certificate is invalid or does not match the name of the site, ignore the message and click Yes.
- Enter the administrative user name and password for your system when prompted,
and then click OK.
|
NOTE: The default administrative user name is administrator and the default
password is powervault.
|
The NAS Manager is displayed. After the NAS Manager is displayed, you can configure your system through the NAS Manager or through the Terminal Service Client. See "Configuring the IP Address" in "NAS Manager."
This section assumes that you have already configured your client system to connect to the NAS system. If you have not configured the client system, see "Setting Up the Windows 2000 Client for the First Time."
- Ensure that your NAS system is on and that it has had sufficient time to boot into the
Windows operating system.
|
NOTE: The NAS system takes approximately 5 minutes to boot. You should allow an
additional 5 minutes for the serial connection service on your NAS system to start.
|
- On the client system that is connected to the NAS system, right-click My Network
Places on the desktop, and click Properties.
The Network and Dial-up Connections window appears.
- Double-click the connection you created in "Setting Up the Windows 2000 Client for
the First Time."
- Enter the administrative user name and password for your NAS system.
|
NOTE: The default administrative user name is administrator and the default
password is powervault.
|
- Click Connect.
This action connects the client system to the NAS system through the serial cable.
- Start a Web browser on the client system you are using to configure the NAS system.
- Type https://192.168.192.1:1279 in the browser and press <Enter>.
192.168.192.1 is the IP address used by your NAS system for this serial cable connection.
- Click Yes to accept the security certificate.
If a message states that the name on the security certificate is invalid or does not match the name of the site, ignore the message and click Yes.
- Enter the administrative user name and password for your system when prompted,
and then click OK.
|
NOTE: The default administrative user name is administrator and the default
password is powervault.
|
The NAS Manager is displayed.
After the NAS Manager is displayed, you can configure your system through the NAS Manager or through the Terminal Service Client. See "Configuring the IP Address" in "NAS Manager."
- Connect one end of the serial cable provided with your NAS system (see Figure 1-2) to
the serial port on the NAS system, and connect the other end to an available serial port
(typically COM1 or COM2) on a client system running Windows XP.
- Plug in the NAS system.
- Push the power button to turn on the NAS system.
|
NOTE: The NAS system takes approximately 5 minutes to boot.
|
- Click the Start button and click Control Panel.
- Click Network and Internet Connections.
- Click Network Connections.
- Click Create a new connection in the left pane.
- In the New Connection window, click Next.
- Click Set up an advanced connection, and then click Next.
- Select Connect Directly To Another Computer, and then click Next.
- Select Guest, and then click Next.
- Type a name for the connection to the NAS system in the Computer Name field.
- From the Select a Device menu, select the COM port on your client system to which
you connected the serial cable, and then click Next.
The COM port is the communication port on the client system to which the serial cable connects. The COM port used on your client system is typically labeled COM1 or COM2.
- Click Add a shortcut to this connection to my desktop, and click Finish.
This section assumes that you have already configured your client system to connect to the NAS system. If you have not configured the client system, see "Setting Up the Windows XP Client for the First Time."
- Ensure that your NAS system is on and that it has had sufficient time to boot into the
Windows operating system.
|
NOTE: The NAS system takes approximately 5 minutes to boot. You should allow an
additional 5 minutes for the serial connection service on your NAS system to start.
|
- From the desktop of the client system, double-click the icon for the connection to the
NAS system.
- In the Connect window, click Properties.
- In the Properties window, click Configure.
- In the Modem Configuration window, select 115,200 for Maximum speed (bps) and
click OK.
- Click OK again to close the Properties window.
- Enter the administrative user name and password for your NAS system.
|
NOTE: The default administrative user name is administrator and the default
password is powervault.
|
- Click Connect.
This action connects the client system to the NAS system through the serial cable.
- Start a Web browser on the client system you are using to configure the NAS system.
- Type https://192.168.192.1:1279 in the browser and press <Enter>.
192.168.192.1 is the IP address used by your NAS system for this serial cable connection.
- Click Yes to accept the security certificate.
- Enter the administrative user name and password for your system when prompted,
and then click OK.
|
NOTE: The default administrative user name is administrator and the default
password is powervault.
|
The NAS Manager is displayed.
After the NAS Manager is displayed, you can configure your system through the NAS Manager or through the Terminal Service Client. See "Configuring the IP Address" in "NAS Manager."
- Connect one end of the serial cable provided with your NAS system (see Figure 1-2) to
the serial port on the NAS system, and connect the other end to an available serial port
(typically COM1 or COM2) on a client system running Windows NT.
- Plug in the NAS system.
- Push the power button to turn on the NAS system.
|
NOTE: The NAS system takes approximately 5 minutes to boot. You should allow an
additional 5 minutes for the serial connection service on your NAS system to start.
|
- Turn on the client system and log in as an administrator.
- Install the modem on the client system:
- Insert the Microsoft Windows NT 4.0 operating system CD into the CD drive of
the client system.
- Close the Windows CD-ROM menu when it displays.
- From the desktop, double-click My Computer.
- In the My Computer window, double-click Dial-Up Networking.
- Click Install.
- When asked if you want to be able to add a modem, click Yes.
- In the Install New Modem window, select Don't detect my modem; I will select it
from a list.
- Click (Standard Modem Types), and then click Dial-Up Networking Serial Cable
between 2 PCs.
- Click Next.
- Select the port to which you want to install the modem, and then click Next.
- Enter the area code in the Localization Information window, and then click Next.
- Click Finish to complete the modem installation.
- In the Add RAS Device window, click COMx - Dial-Up Networking Serial Cable
Between 2 PCs, and click OK.
- In the Remote Access Setup window, select Dial-Up Networking Serial Cable
between 2 PCs, and click OK.
- Click Dial out only and click OK.
- In the Remote Access Setup window, select Dial-Up Networking Serial Cable
between 2 PCs, and click Network.
- Deselect NetBEUI and IPX as dial-out protocols, make sure that TCP/IP is
selected, and click Configure.
- Click Continue.
- Remove the Windows NT CD from the CD drive.
- Click Restart.
- Log in to the client system as an administrator.
- Configure the modem properties:
- From the client desktop, double-click My Computer.
- Double-click Control Panel.
- In the Control Panel window, double-click Modems.
- For Modem Properties, select Dial-Up Networking Serial Cable Between 2 PCs.
- Click Properties.
- Select 115,200 for Maximum speed and click OK.
- Click Close.
- Create the dial-up connection to the NAS system:
- In the My Computer window, double-click Dial-Up Networking.
- When a message states that your phonebook is empty, click OK to create a new
phone book entry.
- In the New Phonebook Entry Wizard, type a name for the connection to the NAS
system.
- Click I know all about phonebook entries and would rather edit the properties
directly, and then click Finish.
- Click Configure.
- Select 115,200 for the Initial Speed and click OK.
- Click the Server tab, and deselect NetBEUI and IPX.
TCP/IP should be the only protocol selected.
- Click OK.
This section assumes that you have already configured your client system to connect to the NAS system. If you have not configured the client system, see "Setting Up the Windows NT Client System for the First Time."
- Ensure that your NAS system is on and that it has had sufficient time to boot into the
Windows operating system.
|
NOTE: The NAS system takes approximately 5 minutes to boot. You should allow an
additional 5 minutes for the serial connection service on your NAS system to start.
|
- From the desktop of the client system, double-click the icon for the connection to the
NAS system.
- Dial into the NAS system:
- In the Dial-Up Networking window, click Dial.
- Type the administrative user name, password, and domain for your NAS system
when prompted, and then click OK.
|
NOTE: The default administrative user name is administrator and the default
password is powervault. For domain, enter the NAS system's name. The default system
name is DELLxxxxxxx, where xxxxxxx is the system's service tag number. For example, if
your service tag number is 1234567, type DELL1234567. You can find the service tag
number on the top cover of your NAS system.
|
- Start a Web browser on the client system you are using to configure the NAS
system.
- Type https://192.168.192.1:1279 in the browser and press <Enter>.
192.168.192.1 is the IP address used by your NAS system for this serial cable connection.
- Click Yes to accept the security certificate.
- Enter the administrative user name and password for your system when prompted,
and then click OK.
|
NOTE: The default administrative user name is administrator and the default
password is powervault.
|
The NAS Manager is displayed.
After the NAS Manager is displayed, you can configure your system through the NAS Manager or through the Terminal Service Client. See "Configuring the IP Address" in "NAS Manager."
- Plug in the NAS system.
- Connect one end of an Ethernet cable (see Figure 1-1) into the port labeled "LAN 1"
on the back of your NAS system.
|
NOTE: Do not use the Ethernet crossover cable that was shipped with the NAS system.
|
- Connect the other end of the Ethernet cable to a functioning Ethernet jack.
- Connect a client system running Windows 2000 to a functioning Ethernet jack.
- Enable the Dell OpenManage Kick-Start utility and create your DHCP settings:
- Insert the Resource CD into the CD drive of the client system.
- When the Resource CD window displays, click Kick-Start.
- Click Run Dell OpenManage Kick-Start.
- If a security warning appears, click Yes.
- When asked if you want to run the program, click Yes.
- At the bottom of the Dell OpenManage Kick-Start window, click Setup.
- Click Add.
- In the Add Scope window, type the following information and click OK:
- Starting IP Address: 10.40.10.10
- Ending IP Address: 10.40.10.20
- Subnet: 255.255.255.0
- Gateway IP Address: 10.40.10.1
- Click OK to close the Add Scope window.
- Click Interfaces for DHCP Server so that it is checked.
- Click OK to close the Setup window.
- Click Enabled at the bottom of the Dell OpenManage Kick-Start window to start the
integrated DHCP server.
- Click OK to close the Add Scope window.
- Turn on the NAS system.
When the system completes booting, it is displayed in the Discovered Systems list of the Dell OpenManage Kick-Start window.
|
NOTE: The NAS system takes approximately 5 minutes to boot.
|
- Click the NAS system in the Discovered Systems list.
- Click Launch Configuration Tool to launch the NAS Manager.
The Configuring icon is displayed for 5 minutes after you click Launch Configuration Tool. If the agent is still running after 5 minutes, the icon displays "Ready."
|
NOTE: The Kick-Start automatic configuration tool is not supported on the
PowerVault 715N.
|
- Use the NAS Manager to configure the NAS system's IP address.
See "Configuring the IP Address" in "NAS Manager."
If you do not use the Kick-start utility to configure your system, you must disable it immediately. If the Kick-Start utility is enabled, the system logs in automatically as administrator, which creates a security risk. The Kick-Start utility also takes up system resources by constantly checking for configuration information.
To disable the Kick-Start utility, perform the following steps:
- From the NAS Manager primary menu, click Maintenance.
- Click Terminal Services.
- Log in to the system as an administrator.
|
NOTE: The default administrative user name is administrator and the default
password is powervault.
|
- When asked if you want to disable the Kick-Start Agent, click Yes to disable the Kick-
Start Agent and prevent it from running again, or click No if you want the Kick-Start
Agent to continue running and also run when the system reboots.
Table 1-1 lists the additional documentation included with your system.
Table 1-1. Other Documents
|
Document
|
Type of Information
|
User's Guide | System features, technical specifications, and device drivers. |
Installation and Troubleshooting Guide | Instructions for installing system hardware and troubleshooting and diagnostic procedures for testing your system. |
System Information | Basic information about your system, including safety and regulatory information. Warranty information may be in this document or as a separate document. |
Resource CD | Electronic copies of your system documentation and documentation for options such as NICs. |
Readmes and Release Notes | Last-minute updates about technical changes to the system or advanced technical reference material intended for experienced users or technicians. |
Information Updates | Documents that are sometimes included with the system to describe changes to the system or software documentation. Always read the updates before consulting any other documentation. The updates often contain information that supersedes the information in the other documents. |
Back to Contents Page