
BCR # 6
FECO: |
BCR # 6 |
MODIFICATION NO: |
N/A |
PRODUCT: |
SYMBOL PDT 6800 HAND HELD DATA CAPTURE UNIT. |
SUB-ASSEMBLY: |
N/A |
ESTIMATED MAN HOURS: |
N/A |
CLASS OF CHANGE: |
MANDATORY |
REASON FOR CHANGE: |
INSTALLATION INSTRUCTION FOR HHDCU - ON AN SVR4 CHARISMA SYSTEM. |
RELATED FECO/AB |
N/A |
SYMBOL PDT 6800 HHDCU ON AN SVR4 CHARISMA SYSTEM
1. Note: Throughout this FECO a SPACE in a string is shown by a Ń .
All other spaces are purely cosmetic
2.
This FECO details the installation of a Symbol PDT 6800 Hand Held Data Capture Unit
(HHDCU)
on a Unix SVR4, Charisma System.
Other FECO’s will be issued for SCO and AIX systems; later.
3. A project plan must be completed which should include a check on the disk space.
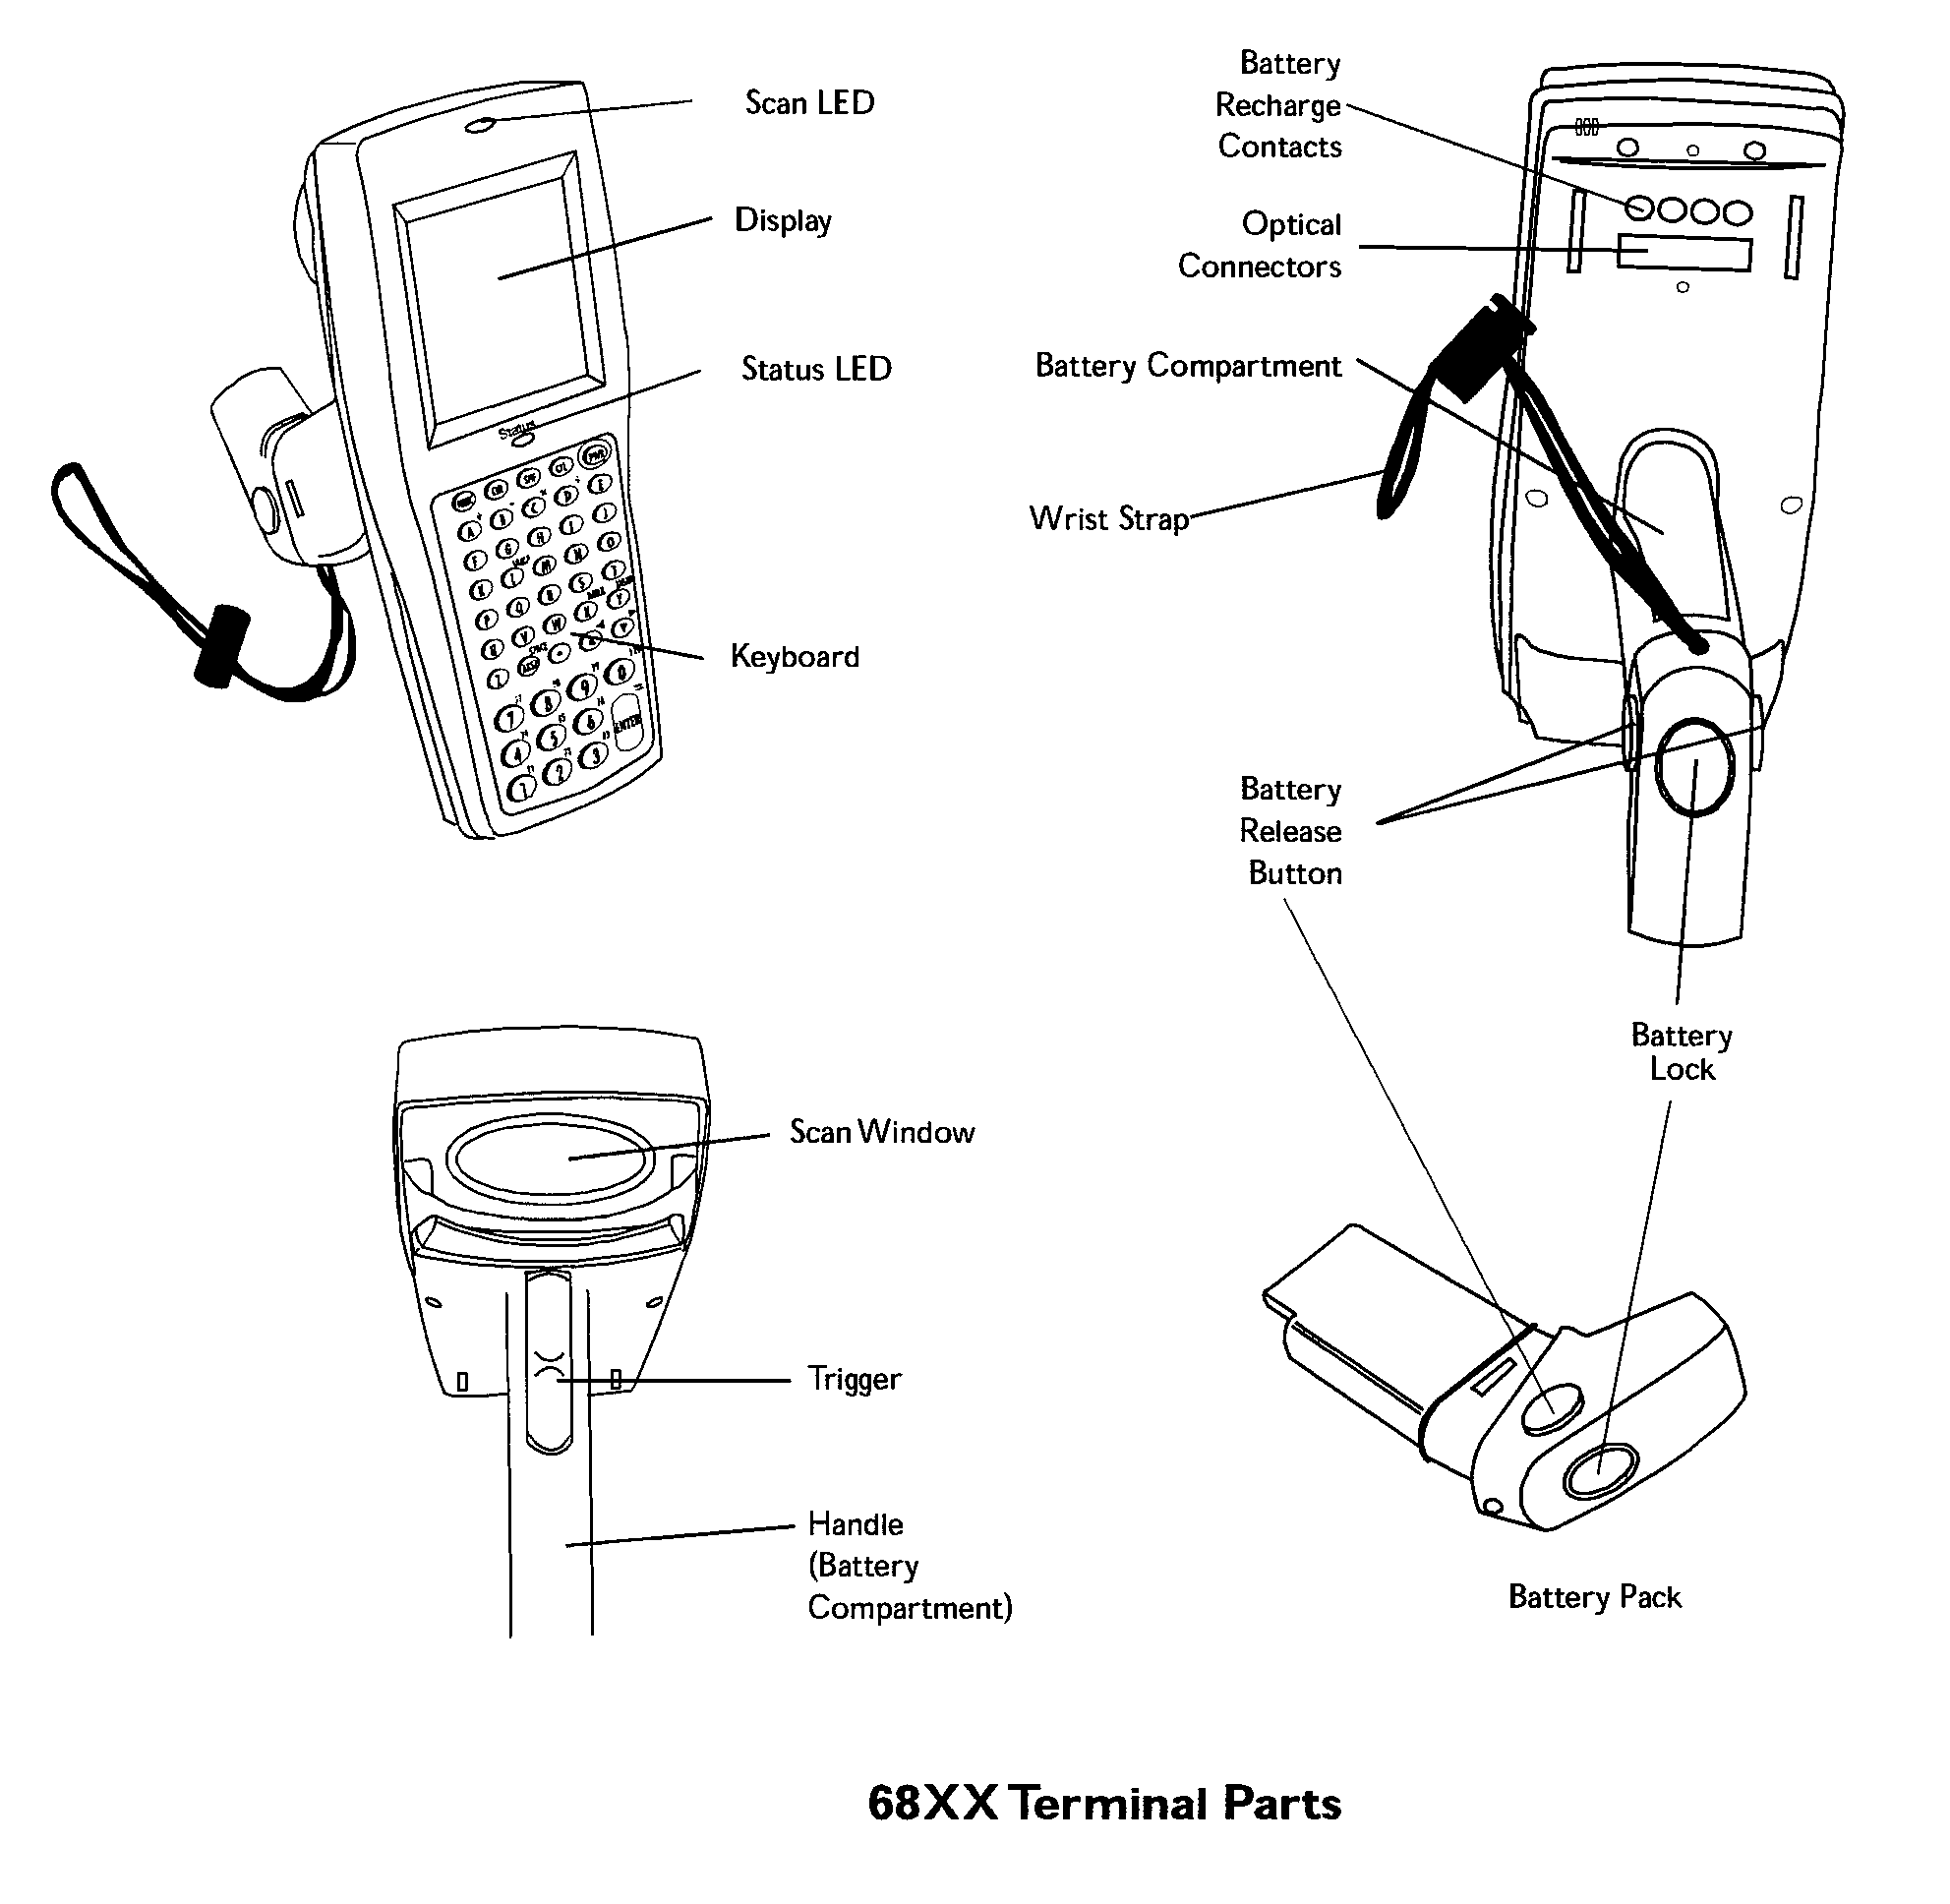
4. The Symbol PDT 6800 HHDCU has a 46 key keyboard and a 16 line display.
It is designed as a laser Portable Data Terminal (PDT) to capture data in warehouses goods
in/out
etc, then be placed in the cradle, and download the data to the system.
5. PDT 6800 KEYBOARD
This model has 46 keys. The keys are multifunctional and may require the press of several
of the
keys simultaneously to give the desired input.
6. PDT 6800 SPECIFICATIONS
To be advised later.
7 SEQUENCE OF EVENTS
7.1 SALE
A PDT6800 is sold as a HHDCU on Charisma.
The sales person must determine the PDT6800 Charisma facilities required by the customer.
Note if the customer has more than one PDT 6800, then they do not have to have a Cradle
and
PSU for each PDT 6800. They can be shared.
7.2 RFH/RFS
RFH/RFS raised and has as part of it the 6800 kit
PDT6800,
PSU
Mains Lead
Cradle
Cradle to COM Port Cable
Software for system to run HHDCU on Charisma.
Other options including cable for Cradle to I/O Port.
It must also have the required BML scanner programs for PDT6800.
This gives the HHDCU its Charisma Menus and facilities. Other software requirements, are
TSC32; and also Trueport if a network connection is required.
The BML scanner programs are flashed into the 6800 EPROM and can have other BML scanner
programs overwrite it later.
7.3 PRODUCTION
Production at PHL holds a copy of the Standard BML scanner programs.
At PHL the PDT6800 is Flashed to have the required BML scanner programs, burnt in. See
para 8.
The PDT6800 is then to be tested on a PC system, using the TSC32 software and sent to the
customer.
7.4 CONNECTION
There are two methods of connection,
- A serial I/O port of a Unix SVR4 system
- A Windows PC
7.5 INSTALL on a UNIX SVR4 SYSTEM
The PDT is installed onto the prepared Charisma System and tested.
The system must have the necessary Charisma software loaded to be compatible with the
HHDCU and a system port available for connection of the Cradle. This port must be directly
linked
to the system, like on an IO8+, or have software running that does the same function; like
Trueport.
7.6 INSTALL on a WINDOWS PC
The PDT is installed on the Com Port of the PC. The PC must have the TSC32 software loaded.
7.7 SERVICING
A spare PDT 6800 will be held with the Standard BML scanner programs already on it.
In the event of a PDT6800 failure, this spare could be used as it is OR the Customer can
amend the
scanner with his Customised BML scanner program.
8 TO FLASH THE PDT6800 SOFTWARE (BML scanner programs).
8.2 REQUIREMENTS
The PDT6800, complete with battery.
3805/6800 Cradle complete with PSU.
Cable Type BO1.
Windows PC, and TSC32 with Flash Software (Standard BML
scanner programs called sh32 bml.hex )
8.2 FLASH ACTION
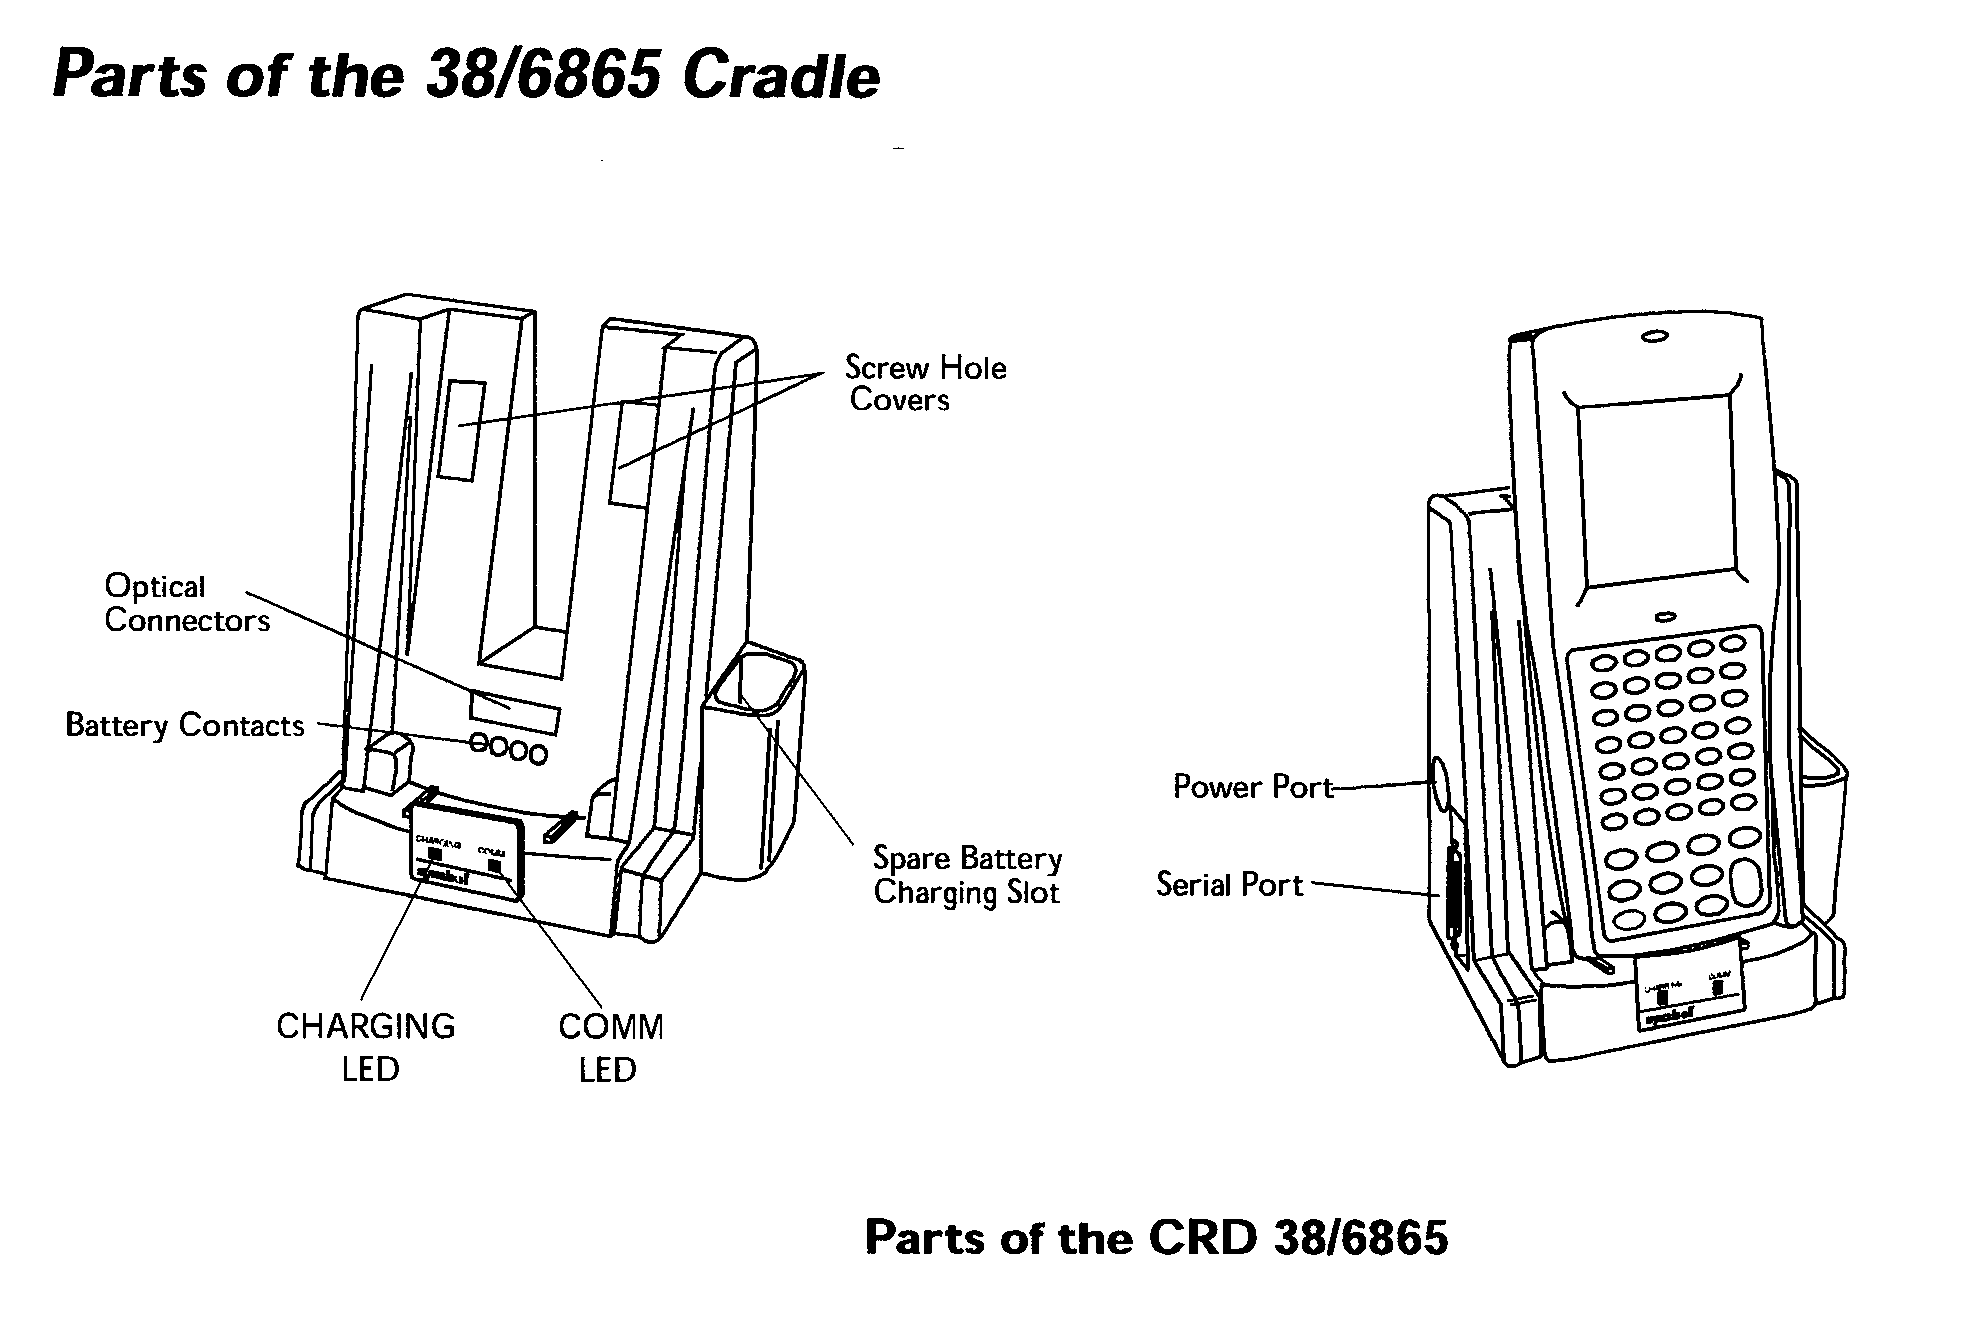
8.2.1 Connect the BO1 cable to the Windows PC COM Port, and to the 6800 Cradle.
8.2.2 Install the PDT6800 with a battery,
CORRECTLY in the Cradle, connect the PSU to the Cradle and
switch the power
on. The Cradle green CHARGING LED should flash.
8.2.3 Allow the PDT6800 to charge up if necessary.
8.2.4 Switch off
8.2.5 Reboot the PDT6800.
Hold down F and I keys whilst switching on (Pressing the red PWR key)
8.2.6 When booted, use the up & down arrow
keys to scroll through the Select Function to highlight
Program
Loader then press ENTER key.
8.2.7 At prompt, Confirm you want to erase the EEPROM by pressing ENTER
8.2.8 Accept all the defaults by pressing the ENTER key
each time
EXCEPT for
Speed which should be set to 38400
Flow Control which should be set to XON/XOFF.
Use the up & down arrow keys to toggle options
8.2.9 Press ENTER to start, the PDT6800 will sit and wait for the PC.
8.2.10 On the PC use the TSC32 program and select the BML_PROG icon
from the
C:\scan_tsc\program\tsc32
folder.
8.2.11 When completed switch off the PDT6800 and cold Reboot
it by
Holding
down the A B D keys.
Press and release the PWR Key
Release the A B and D Keys
8.2.12 Flash procedure completed.
The Charisma menu should be displayed.
| Charisma 1,Stock Take 2,Stock Receipt 3.Stock Issue 4.Order Confirmation 5.Kanban 6,Remote Control 7,Admin Menu |
9. Test Scan & Download
9.1 You will now be able to perform a test scan and subsequent download to the PC.
| Charisma 1:Stock Take 2:Stock Receipt 3:Stock Issue 4:Kanban 5:Remote Control 6:Admin Menu |
Select Option
3, Stock Issue for the test scan. To select; enter the number, or use á & â to high light
the option then
press enter.
9.2 File Name
| Charisma File: XIDLN000 |
You will be prompted
to enter/confirm a file name. Confirm the default by pressing enter but note it
down first.
9.3 Stock Issue
Stock Issue Bar No: ---------------- Qty: --------- |
Scan & enter the following:
Bar code number (up to 16 character alphanumeric).
Quantity (up to 8 character numeric).
Repeat this process with 2 or 3 entries and then press enter or select option 5 to download the file.
9.4 Remote Control – Preparing For Download
The file
selection will be driven from the PC and you will not be prompted to enter a file name on
the
scanner.
| TSC XFER METHOD COM1 @ 38.4K ENTER = Continue Other Key = Exit |
The scanner will display the transfer method and prompt
the user to either continue or abort. The
scanner should now be placed in the
cradle ready for download.
| TSCS – 1.01.00 COM1 @ 38400 bps PRESS "Q" TO QUIT |
The scanner is now waiting for the command from the PC program to
transfer the file. Please refer to
section 3.3.
(TSC Functionality).
9.5 Download via TSC32
For easy access it is suggested to copy the scan_utl folder and paste it on to the desktop.
In order to use these utilities the scanner must be in the cradle and in ‘Remote Control’ mode.
The
relevant utilities perform as follows. You will use ‘scan2host’ to download the
test file from the
scanner:
9.6 Scan2Pc: Transfers the named file from the scanner to the PC and puts it into ‘C:\scan_tsc\data’ folder

9.7 List_Scan: Displays all the scanner files on the screen
and at the same time writes them to a file
called ‘list_scan.txt’ with in
the C:\scan_tsc\data folder. Every time this utility is run, the list_scan.txt gets
over written.
9.8 View_scan: Displays the contents of the named file on the
screen and at the same time writes to a file
called ‘View_scan.txt’ within
the C:\scan_tsc\data folder. Every time this utility is performed the scanner
file ‘View_scan.txt’ gets over
written.

9.9 Check Downloaded File
Within the
‘C:\scan_tsc\data’ folder, view the file to ensure that it has correctly
downloaded. If so, then
that is your bit done !
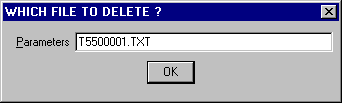
9.10 Del_Scan: Deletes the named file from
the scanner. In order to delete all the scanned files, type in
‘*.TXT’
Note:Never type in ‘*.*’ as this will delete everything on the scanner including the ‘env.bat’ set-up file.
9.11 Test completed.
10 PDT 6800 BOOT SEQUENCES
10.1 COLD BOOT
This resets the BIOS
and operating system, it erases and recreates the RAM disk.
TO BE USED WITH EXTREEM CAUTION.
Power off the PDT 6800
Press and hold the A B and D Keys
Press and release the PWR Key
Release the A B and D Keys
10.2 WARM BOOT
This resets the
operating system while preserving the RAM Disk
Power off the PDT 6800
Press and hold the 4 and 5 Keys
Press and release the PWR Key
Release the 4 and 5 Keys
10.3 BOOT TO COMMAND MODE
This takes you out of
the operational mode.
Power off the PDT 6800
Press and hold the F and I Keys
Press and release the PWR Key
Release the F and I Keys
11 PDT 6800 CUSTOMER INSTALLATION
11.1. Connect the Cradle to the serial port connector on an IO8 RTC, MTS
or Jetstream by means of Cable
Type H, or to the COM1,
9 pin D Type, by means of a cable type BO1; or to the COM2, 25 pin D Type,
by means of a cable
type KZ.
11.2. Install the PDT in the Cradle CORRECTLY. It needs to be
sitting down completely, and it is very easy
to sit it up about 5mm,
where it will not make proper contact. This needs to be pointed out to the
customer.
11.3. Connect the PSU to the Cradle and switch on.
11.4. If necessary allow the PDT 6800 to charge up fully.
11.5 There are two methods of use, one interfacing directly with
Charisma by connecting the PDT6800 to
an I/O serial port; the other is
connecting to the Comm port of a PC and using the TSC32 software to
capture and down load the data.
12 For connection to a PC, use the Cable Type
BO1 or KZ; to connect the cradle to the com port. Test as
per para 9.
13 SYSTEM I/O SERIAL PORT CONNECTION
13.1 PORT SET UP
Ensure that the port is set for 9600 8, I, N, XON XOFF.
13.2 Connect the PDT6800 to the port, by means of a cable type H.
13.3 If the port is directly connected to the system, like an IO8 + port, then go to para 15.
If the port is networked, like on an MTS or Jetstream then Trueport must be used.
14 TRUEPORT
14.1 Ensure trueport is installed as generally detailed
in FECO NET # 2 with the additions as detailed
below
14.2 Adding a Trueport port for use by the PDT 6800 Bar code scanner
14.3 Use the Trueport menu's
At root enter tp.menu
This displays the
Trueport Administration Menu
Use the above to add ports
14.4 Select 4 Add Trueport Port
14.5 Enter the port to be added eg. 7 Ń 7 for port 7
Added service X007
Add Ports Complete
Press any key to continue
Takes
you back to the Administration menu
14.6 Select 1 Display Trueport Status
Please enter the trueport X number eg X010
or press <Q>uit
Enter X007 <CR> (this is case sensitive)
Display Example :
X007 TruePort Status
ENTRY IN THE /etc trueport/config.tp file
tpd -port 10007 –tty /dev/term/X007 –ka 30
TRUEPORT DAEMON
root 3337 1 0 01:17:13 ? 0:00 tpd –port 10007 –tty/dev/term/X0
06 –ka 30
PORT SERVICE
trumon 0 ttymon X007 u root login /dev/term/X007
- - /usr/bin/login - 9600NP pterm, idterm TP1 Logon: -- #
X TERMINAL DEVICE
crw--w----
3 root tty 24, 1 feb 21 01:17 /dev/term/X007
Press any key to continue
14.7 In the above example note the line below
ENTRY IN THE
(tpd -port 10006 –tty /dev/term/X007 –ka 30 ) The 30, the keep alive
time at the end of this
line must be changed to 0, no keep alive
14.8 At the Administration menu press Q to quit tp.menu.
14.9 To change keep alive time
Cd / etc/trueport
cp config.tp config.tp.orig
vi config.tp
find the line to be altered and change the 30 to 0. Save the file
14.10 Enter tp.menu
14.11 Select RESET TRUEPORT DAEMON
Please enter the trueport X number eg. X010
or press <Q>uit
14.12 enter the number of your new port eg X007
<CR>
X007 Trueport daemon has been restarted
press any key to continue
14.13 Exit tp.menu
14.14 At root telnet the mts / jetstream
14.15 Go to line settings
14.16 virtual circuits
14.17 Set the line for use with scanner to:
Line Hostname Type
Host Port MTS Port
sil raw 10007
23
14.18 The Host Port is the tpd number given in the tp.menu
under Display trueport status
e.g.
ENTRY IN THE /etc
trueport/config.tp file
tpd -port 10007 –tty /dev/term/X007 –ka 0
the above example is for port 7
14.19 Save and reboot the mts / jetstream
14.20 Check the port with a VDU the login should have
changed to TP1 Login showing that it is now a
trueport
port login to bml and check that it goes to the tty prompt. logout and remove the vdu from
the port.
14.21 Connect the bar code reader to the port.
15. PDT6800 SET-UP
From the
Charisma Main Menu select the Admin Menu, and enter the Admin password.
Set baud
rate to 9600
set date
and time
set device
number Check with the customer, but for the first one you need usually to enter 1
and
increase sequentially for additional units.
Inform the
customer
set xfer
type to POLL
Exit set
up menu and return to the Charisma Main Menu.
The PDT is
now set up ready for use.
16 TEST PDT 6800
16.1. Once set up, pressing the PWR button brings up the main menu, shown below
| Charisma 1, Stock Take 2, Stock Receipt 3. Stock Issue 4. Order Confirmation 5. Kanban 6, Remote Control 7. Admin Menu |
16.2 To select an option, highlight it, using the number or the Ý or ß keys; then press ENTER.
16.3. Select the Option for STOCK ISSUE, by highlighting, then press ENTER.
16.4 The prompt displays a FILENAME , eg
I0100001 NOTE THIS FOR
LATER then press ENTER
to accept.
16.5 At prompt Bar, point scanner at the target bar code and operate the trigger.
A bleep indicates a successful read and decode.
16.6 The following two entries may or may not be present depending upon the customer requirement.
16.7 At prompt Batch, either enter a Batch Number and press ENTER; or just press
ENTER.
16.8 At prompt Bin, either enter a Bin Number and press ENTER; or just press
ENTER.
16.9 At prompt Qty, enter a Quantity and press ENTER.
16.10 Repeat 16.5 and 16.9 till you have successfully read several different bar codes.
16.11 When you have done this press ENTER, and the PDT6800 will be ready to download to a system.
16.12 The screen will display File:v_______ enter
the filename, noted in xxxx above eg I0100001.
This MUST
be identical. When you have entered this correctly the PDT6800 recognises it as correct
and is then
prepared to transfer data the screen showing POLL XFER METHOD
COM1 @ 9.6K
ENTER = Continue
Other Key = Exit
16.13 Press ENTER.
16.14 Screen displays PRESS ANY KEY
TO ABORT
16.15 Place PDT 6800 in the Cradle.
17.1 On the system log to bml
17.2 Enter the password.
17.3 At the tty prompt enter scantest <CR>
17.4 An information screen is displayed
This script will test whether a bar coding scanner is downloading
the information required correctly, to establish if there is a problem
With the Charisma software receiving it.
You will need to know the device path and Scanner model to carry
On. If you are unsure of these they can be checked in the Bar
Coding Parameters (option 1).
Press Return to continue or q to quit
17.5 Prompt What is the scanner ID Enter ID number e.g. 1
17.6 Prompt What type of download is being
performed?
1
Stock Issue
2
Stock Receipt
3
Stock Take
Enter choice (1,2,3) ? Enter 1
17.7 Prompt What type of scanner is being used
1. LDT (Programmable)
2. 2 PDT 1000
3. enter choice (1,2,q to quit)? Enter 1.
17.8 Screen displays
TESTING SCANNER
Please wait
Rscan: Sending LdtDownloadData Command
Rscan: Transmission OK
If the scanner download was unsuccessful, check the Rscanlog file
In /charisma/users/bml for more information and check the status code
Description in the support directory of the Bar Codings Manuals.
If the download was successful, the file output can be viewed in
/charspooler/bml/SF/scan_test.
17.9 cat / charpooler / bml / sf / scan_test <CR>
17.10 A table similar to the example below should be seen
ddddddddddddddddN/A------------N/A---qqqqqqqq
3033710093083 N/A N/A 1
3033710092918 N/A N/A 1
3033710093083 N/A N/A 1
9770010478021 N/A N/A 2
18 ALTERNATE TEST METHOD
18.1 An alternative method to test the PDT 6800 is shown below
18.2 On system log to bml
18.3 Enter the password
18.4 Enter rscan Ń - v Screen displays version number.
Ensure version is 2.1.1 or greater.
18.5 Prepare the PDT 6800 for downloading as per para 16
But instead of using scantest use the command line below from the bml tty prompt
18.6 Enter
rscan Ń -p <DEV PATH> Ń -d Ń -c Ń 10 Ń -f Ń D: <DEV FILE NAME> Ń -o <FILENAME>
![]()
![]()
![]()
| I/O port that the HHDCU is connected to. eg /dev/term i01 /dev/X007 |
See para 13.3 but append .DAT eg I0100001 |
Destination filename eg TEST1 |
18.7 The data is downloaded from the HHDUU to the system file.
18.8 Display the system file to show
the data in it. e.g vi TEST1 ; and ensure that the bar code
displayed is correct. There may be some extra digits added before or after the number.
1. Sample Output File Formats.
2. D:STKISSU.DAT
ddddddddddddddddN/A------------N/A---qqqqqqqq
3033710093083 N/A N/A 1
3033710092918 N/A N/A 1
3033710093083 N/A N/A 1
9770010478021 N/A N/A 2
18.9 Warning 1.
Do not remove the PDT from the cradle if the COMM light is flashing as it indicates that
data is
being transmitted or a command is being received.
18.10 Warning 2.
A log file named RscanLog_ppp will also be created to give a summary of the communication
with the scanner, where ppp is the same as for the debug file.
Data is appended to this file for each communication with the scanner, so it must be
checked
regularly by the system administrator to prevent it becoming too large.
19 Complete all documentation