 |
FECO: | COMMS # 29 |
| MODIFICATION No: | N/A | |
| PRODUCT: | RACAL MAXAM III+ MODEM | |
| SUB-ASSEMBLY | N/A | |
| ESTIMATED MAN HOURS | N/A | |
| CLASS OF CHANGE: | INFORMATIONAL | |
| REASON FOR CHANGE: | TO INTRODUCE THE MAXAM III+ DIAL UP MODEM |
FECO COMMS # 29
|
FECO: | COMMS # 29 |
| MODIFICATION No: | N/A | |
| PRODUCT: | RACAL MAXAM III+ MODEM | |
| SUB-ASSEMBLY | N/A | |
| ESTIMATED MAN HOURS | N/A | |
| CLASS OF CHANGE: | INFORMATIONAL | |
| REASON FOR CHANGE: | TO INTRODUCE THE MAXAM III+ DIAL UP MODEM |
1.The Racal-Milgo Maxam III+ auto dial modem is used as a dial in diagnostic support
modem, or a leased line
modem. The modem is also known as a Racal-Vadic
VI2422PA modem.
2.It is powered from an external power supply that is unique to the Maxam III+ and must
not be used on any
other of the maxam range. The front and rear
views are shown below.
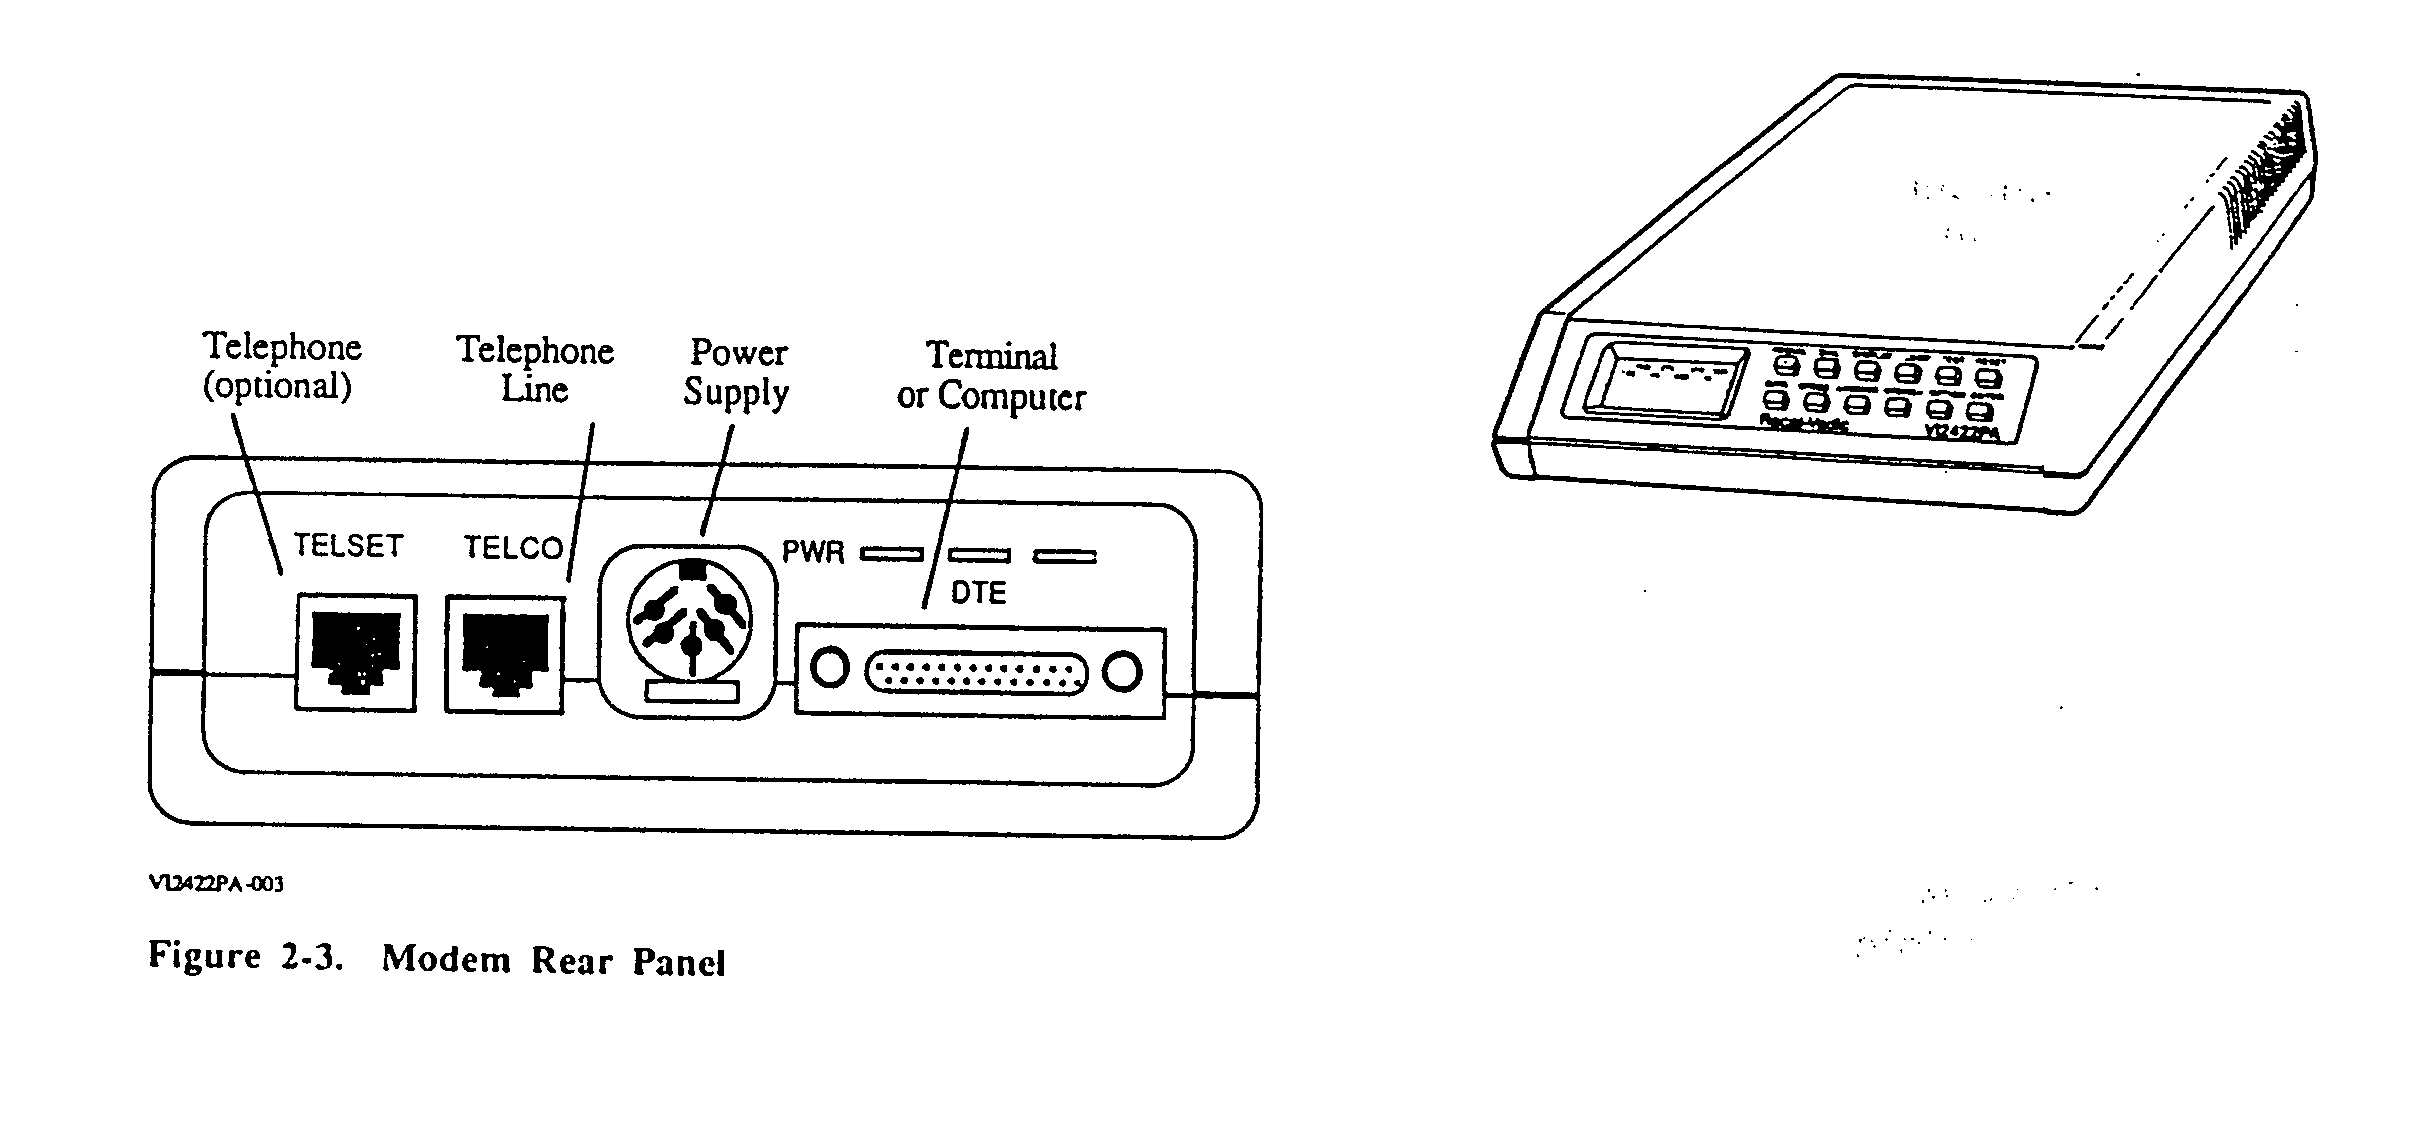
(tech serv ref: 22/1/3)
3.Specification
4.Internal jumpers
4.1.to access the interior. Invert the unit and release the 4 interior holding clips by
using a small screw driver to
ease the clips towards the centre. The case
splits into two, top and bottom and the interior card may be
accessed. Carefully remove the top case off of
the switches.
4.2.header straps
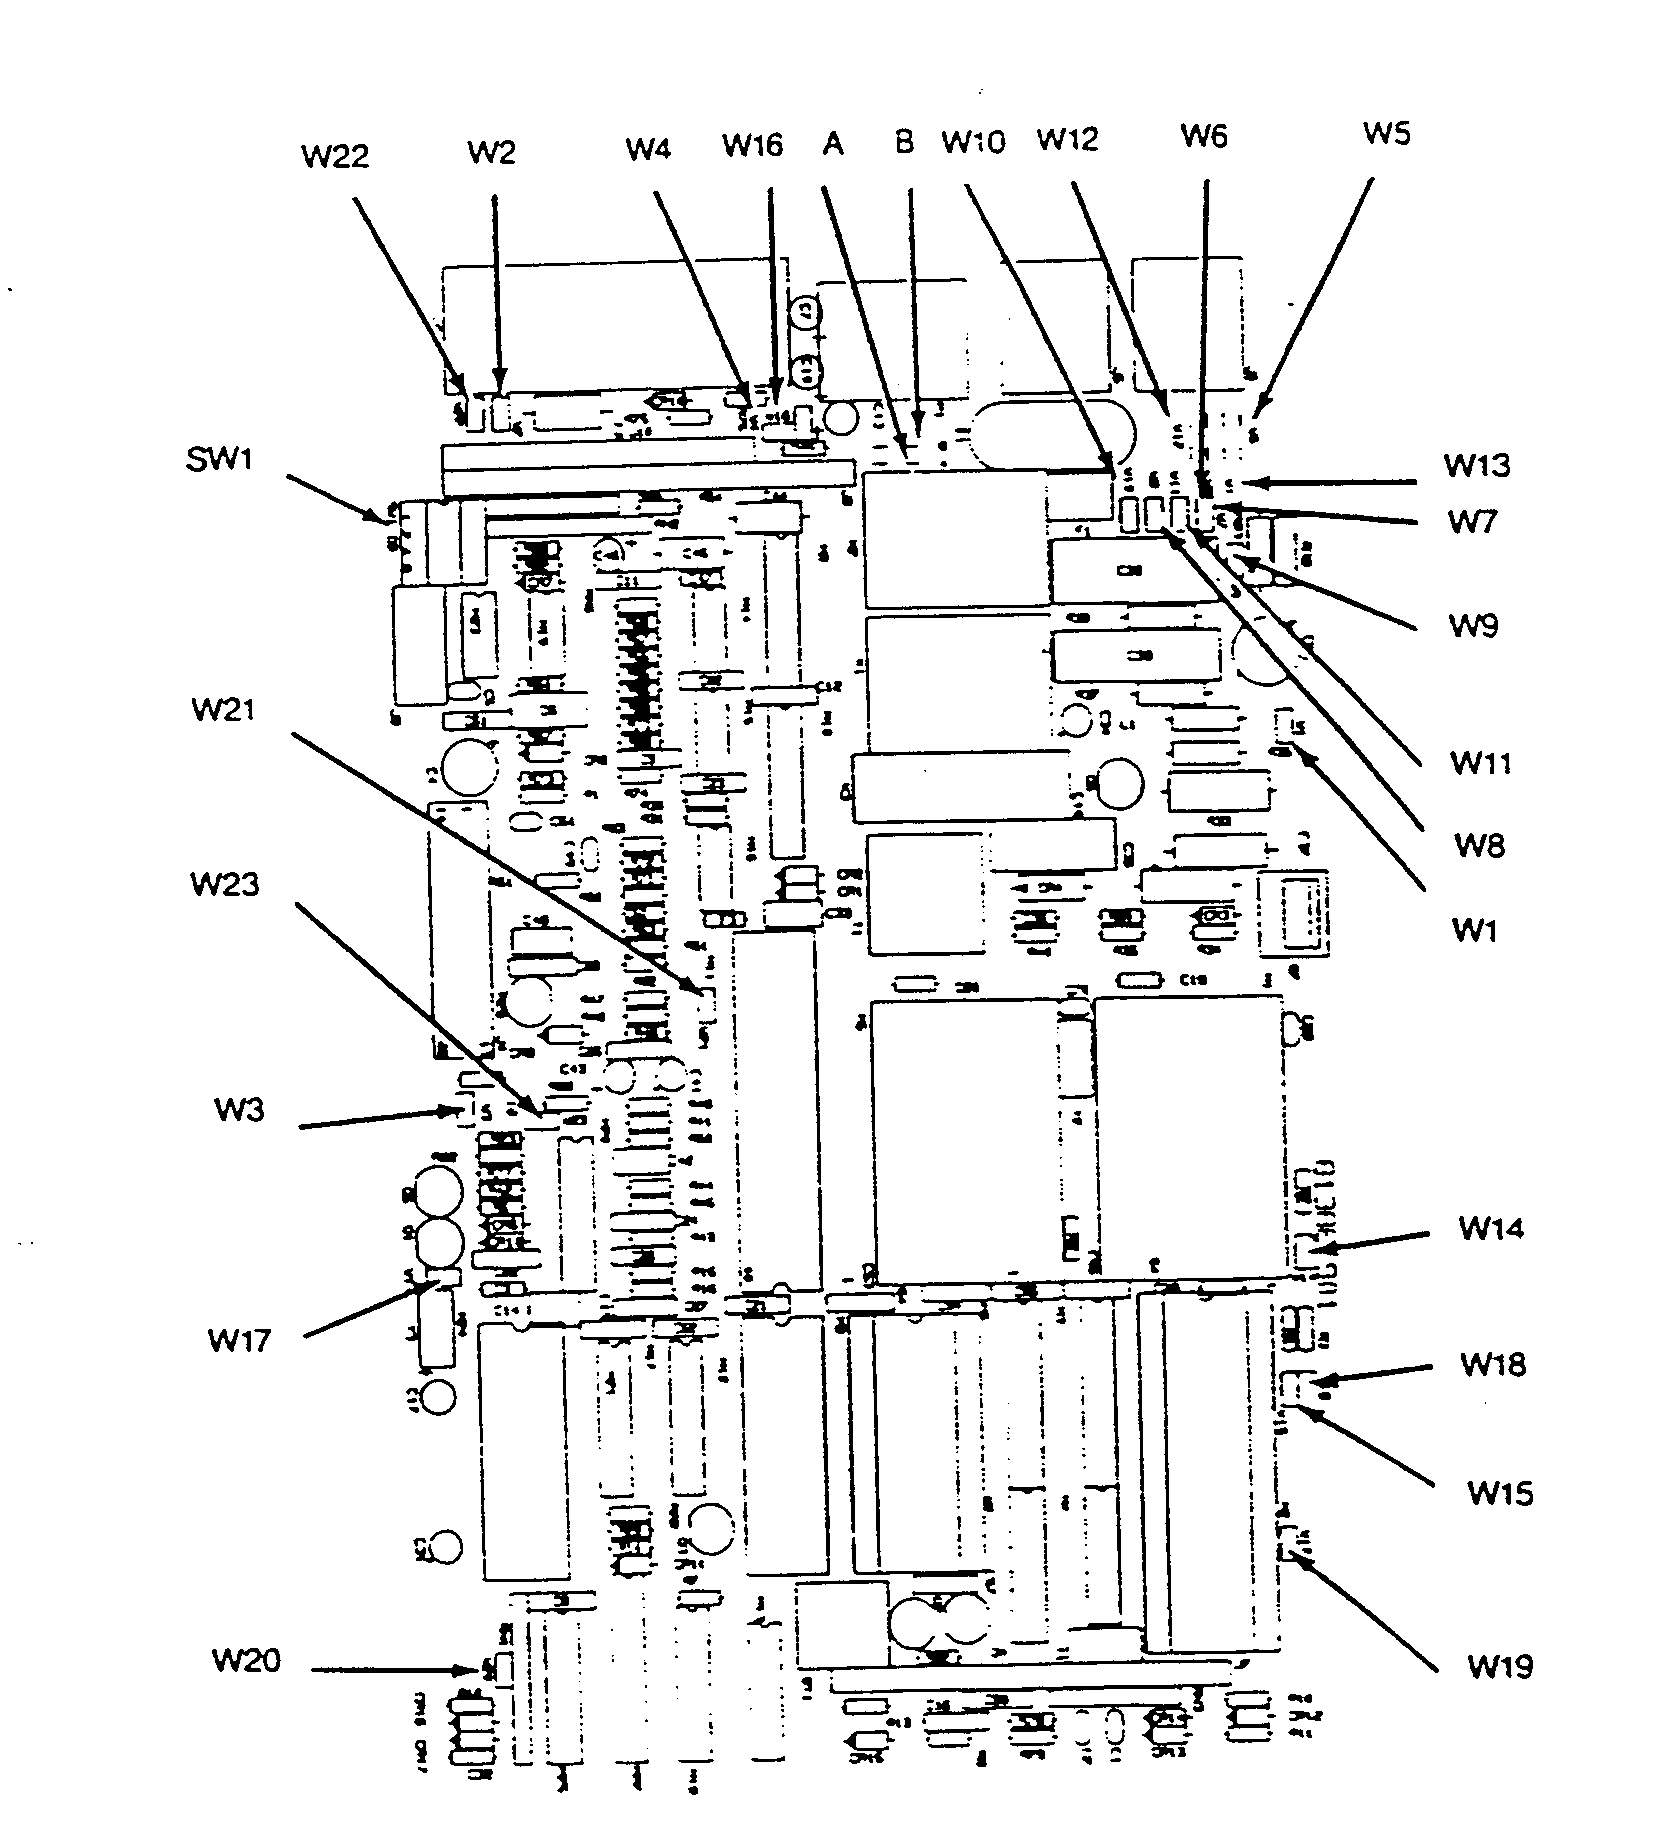
As per factory setting except for
W7 tinkle suppression enable
W10 tel ring enable
W11 tel tip enable
5.On power up the LCD display will show the following sequence.
7.configuration dial up
7.1.connect a vdu to the modem.
Enter at and expect ok response
Enter at*t1 to display current settings - note these
Enter at&f to default to factory settings
Enter at*c1*e1*d1*u1&w
Where *t1 - displays settings
*c1 - enables speed conversion
*e1 - automatic connection with or without error control
*d1 - data compression
*u1 - v42 error control
&w - saves configuration to memory
&f - factory default
8.configuration 2 wire leased line.
8.1.switch bank 1 - set 1 off
2 on
3 off
4 on
8.2.jumpers W9, W8 & W21 all on
8.3.through the front panel set option 30 to:-
For host end of link 2
For peripheral end of link 3
Press the option front panel button.
The lcd panel will display "option:"
Press 3, 0, then enter.
The LCD panel will display existing setting, e.g. "op 30*1".
To change the setting press 2 or 3 as
detailed above, then press enter. The LCD display will show the new
setting, then show "option:".
Press the reset button to initialise the unit.