COMMS # 65
 |
FECO:
|
COMMS # 65 |
|
MODIFICATION NO:
|
N/A |
|
PRODUCT:
|
PERLE/CHASE ROUTERS |
|
SUB-ASSEMBLY:
|
N/A |
|
ESTIMATED MAN HOURS:
|
N/A |
|
CLASS OF CHANGE:
|
INFORMATIONAL |
|
REASON FOR CHANGE:
|
INTRODUCTION OF CHASE
EQUIPMENT |
|
RELATED FECO/AB
|
COMMS # 62, 63 & 64 |
PERLE/CHASE ROUTERS
GENERAL INFORMATION
1 NOTE: Throughout
this F.E.C.O a SPACE in a string is shown by a Ń .
All
other spaces are purely cosmetic
2 INTRODUCTION
2.1 EDP is now supplying Perle/Chase
Bridges & Routers to our customers.
Other
FECO’s will detail specific equipment specifications and set-up information. This
F.E.C.O
details the general information that applies to most Perle/Chase equipment.
2.2 Henceforth the equipment will
be known as Chase, rather than Perle/Chase.
2.3 Configuration of Chase
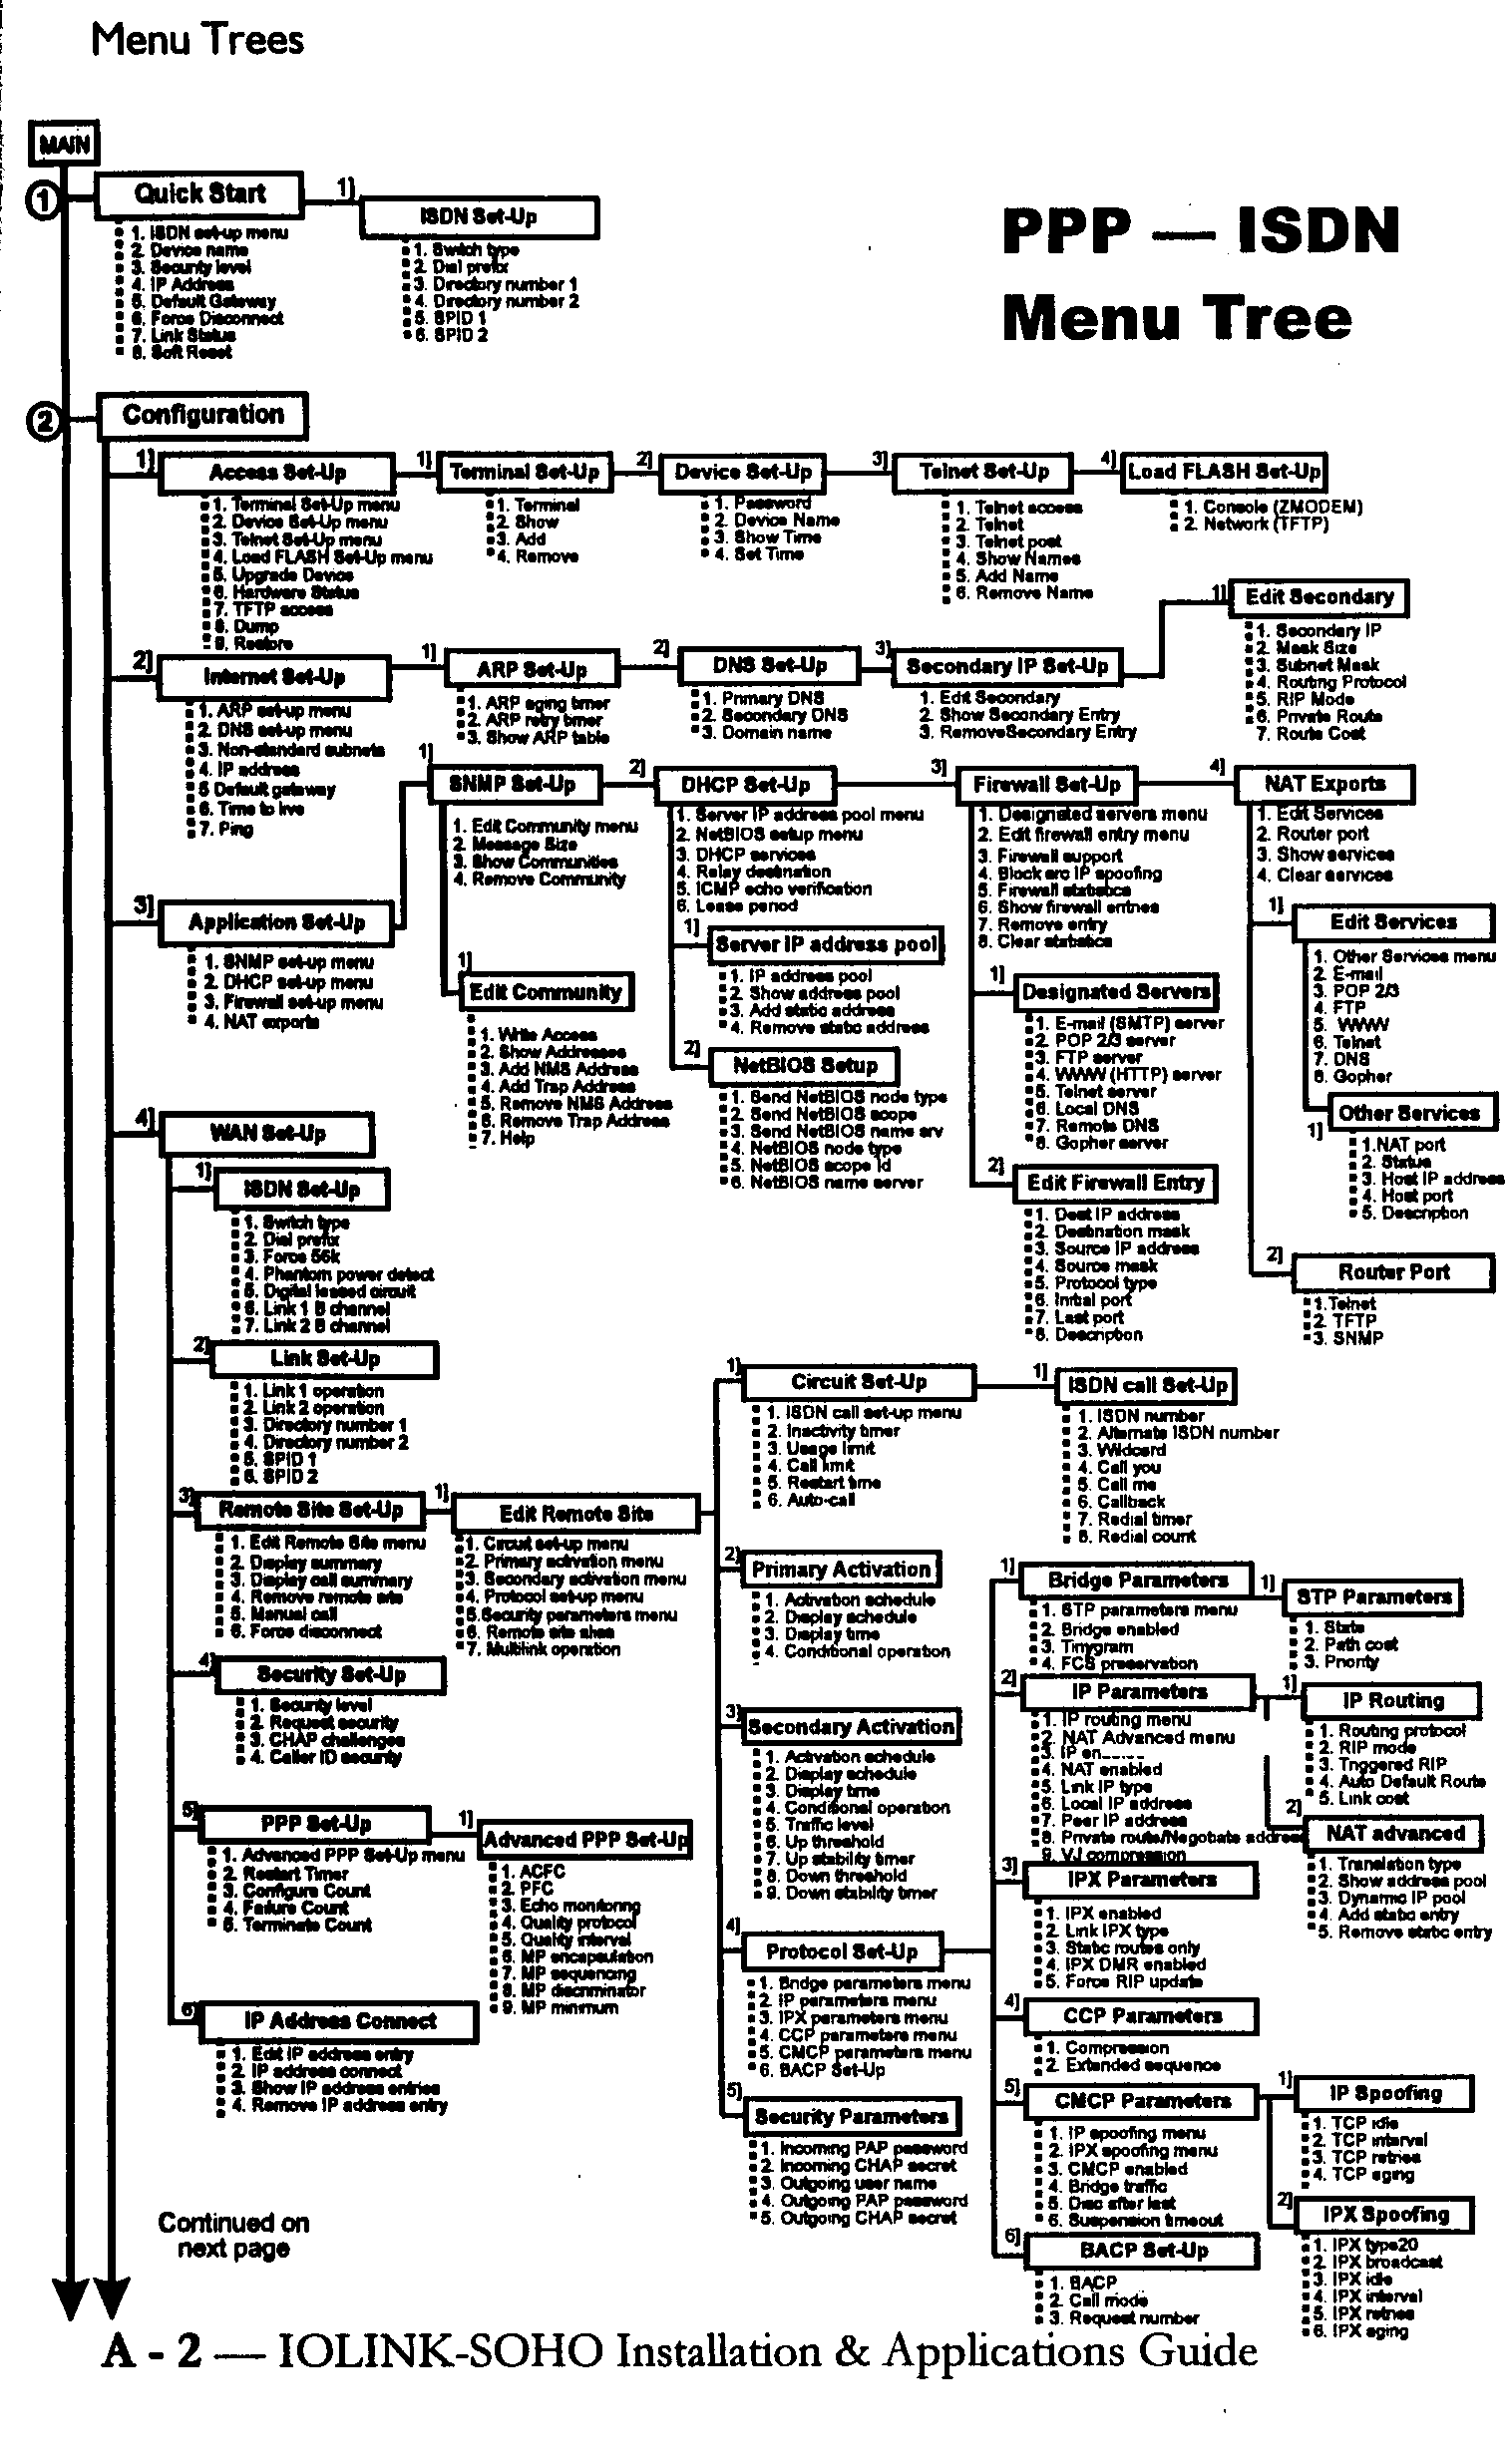
equipment uses a standard type of format, a menu tree.
2.4 With most Chase equipment
comes all the required cabling to connect the console port to a
VDU
or PC.
3 CONFIGURATION
METHODS
Chase
devices may be configured using the following basic methods.
Manually
via a VDU or PC connected to the console port, by entering
all
the commands.
Semi-automatically
by interrogating a device, to retrieve its settings and
then
modify them as necessary and then download them back to the device or
onto
another device or floppy.
Semi-automatically
from a pre-prepared floppy.
The
above can be used individually or any combination of some or all of them. It may also be
possible
to telnet the device and do the same.
4 CONFIGURATION
RECORD
Prior
to the installation of Chase equipment, a paper hard copy of the set-ups
(Configuration
Record) is to be produced, and is to travel with the equipment to the site,
and
be kept on that site. If possible the Configuration Record should be updated
whenever
any changes are made.
Also
an electronic copy of the Configuration Record must be kept/sent to Production.
Production
are to keep the Configuration Records electronically, and send a copy to
Technical
Services at Linford Wood.
These
Configuration Records are available to support functions on the Office
Services
System;
Office
Service
My
Computer
Office(C)
Offsbu
Cisco
setup
5 REQUIREMENTS
Before
Chase equipment can be configured the following must be available:-
Network
diagram of the complete network
Name
(preferrably geographical ie.HULL) of both Routers.
IP
Address and Subnet Mask of both Routers.
Type
of line. ISDN numbers if applicable.
For
Optional Customer Preference settings:-
PAP,
CHAP Passwords.
Source/Destination
IP Addresses of the data.
ISDN
useage and inactivity dates and timings.
6 CONVENTIONS USED
6.1 The Menu System is in the form of a
tree shown at the end.
6.2 To go forwards through the Menu
System Enter the Option Number required, usually you do not
need to
follow this with a <CR>.
6.3 To select an option enter the
Option number and enter the required input. If the input has fixed
options,
then these will be displayed; just enter enough of the characters for it to be unique.
i.e. jun
for june, but only d for december. For options like IP addresses they must be entered in
full.
Most
entries require a <CR> to terminate data input. Any entry that is not acceptable,
like an out of
range IP
Address, will be identified as unacceptable and you will be invited to try again.
6.4 To toggle between two options e.g.
enabled and disabled, just enter the option number, and if
it prompts "yes"
to enable/disable parameter. Enter yes <CR> to complete the toggle.
6.5 To go backwards through the Menu
System use the TAB key.
To return to the Main Menu Enter =
6.6 At the end of each sequence it is
advisable to save the configuration , From the Main Menu select
the
option Save configuration. When completed Configuration saved will be
displayed at the
bottom
of the screen.
6.7 On completion of all set-ups Save
configuration and also carry out a soft reset, from the Main
Menu select
Diagnostics and then Soft reset.
6.8 A Soft
reset can be used to reset some minor problems.
6.9 NOTE,
there may be some variation in menus and the menu numbers between different
units,
which is why the set-up procedures do not give the numbers, but do give the
description.
7 INITIAL
CONFIGURATION
7.1 Connect a VDU set to 9600 8-1-N
& VT100, to the Console Port with a Cable Type KJ, for
IO-LINK
SOHO & 130, or a Cable Type H for an IO-LINK PRO.
7.2 Power on the IOLINK and view the
Start-up Testing and Initialising Sequence on the VDU Screen.
7.3 At the prompt Press ENTER to
access console, enter <CR>
7.4 At LOGIN MENU Select 1 Login
7.5 At Password prompt Enter BRIDGE
<CR> This is case sensitive.
7.6
The MAIN MENU will be
displayed similar to this
Option
Value
Description
1.
Configuration menu
- Define operating parameters
2.
Statistics
menu
- Device LAN and WAN statistics
3.
Diagnostics menu
- Access troubleshooting tools
4.
Network events menu
- View network event history
5.
Save configuration
-
Save configuration immediately
6.
Logout
-
End operator session
7.
Help
-
Read menu introduction
All
configurations are menu driven
8 Download
/ Upload using TFTP
8.1 Using TFTP Client
1.5 to save and restore router configurations on Chase & Cisco
8.2 It is possible to save
router configurations to a file. This can either be a file on the main Unix
system,
or to a PC/laptop running a TFTP program such as TFTP Client, as supplied by Chase
Research
on their CD.
8.3 Chase IOLINK routers
can also be reprogrammed using TFTP.
8.4 Use HyperTerminal for
connection between PC & Router for HyperTerminal information see
FECO
COMMS # 58/1 para 7.
8.5 To save a Chase
IOLINK configuration:
8.5.1 Firstly establish that you can telnet to the
Router, then check that TFTP access is enabled on the
Router
[ Configuration – Access set-up – TFTP access ]
8.5.2 1.From Unix
on the system, log into root.
At
the Ł prompt type tftp Ń [address of router] e.g tftp Ń 128.10.10.10
The
prompt changes to tftp>
Now
type get Ń config.txt
This
takes only a couple of seconds to complete and saves the configuration as a file
[
in the Unix root directory ] called config.txt.
This
is an ASCII type file and can be edited if required.
Now
type quit to exit from tftp
Next
pg Ń config.txt to view the file or vi Ń config.txt to edit the file at the root prompt.
8.5.3
2.
From a PC/laptop. Startup the TFTP program on the laptop.
Get
the file from the Router by typing in config.txt in the Remote File window and the Router
IP
Address
in the Remote Host window i.e. 192.1.1.10 and then click on the left arrow button ß .
Make
sure that you use only ascii or netascii protocol for the transfer method by selecting
Asci
Mode.
The destination [ Local ] directory can be altered if required. Now click the ok button to
start
the
transfer.
N.B.
use Wordpad or a Wordprocessing application on the Pc rather than Notepad to view the file
with
the correct line formatting. Ensure that the file is only ever saved as a text file.
8.6 To reprogram a Chase
IOLINK:
8.6.1 Firstly establish that you can telnet
to the Router, then check that TFTP access is enabled on the
Router
[ Configuration – Access set-up – TFTP access ]
Downloading
to an already pre-configured router, this will merge the new configuration into the
existing
configuration. This is useful if you only want to change a small part of the
configuration,
you
can just upload the configuration lines that need changing.
For
full reconfiguration it is recommended that the router is defaulted and programmed with an
IP
address and set with TFTP enabled.
[Config
- LAN set-up – IP set-up – IP address ][ Config – Access set-up
– TFTP
access
enabled ]
8.6.2 Note: on the IOLINK-130 you will also
need to manually set the interface type by disabling the
link,
setting it as V11 then re-enabling the link. This can be done before or after the TFTP
transfer.
[Config
- WAN set-up – Link set-up – Link operation disabled – Link interface type
NONE
– Link interface type V11 – Link operation enabled ]
8.6.3
1. From
Unix on the system, log into root.
At the Ł prompt type tftp Ń [address of router]
e.g tftp Ń 128.10.10.10
The
prompt changes to tftp>
Now
type put Ń config.txt This loads the config file into
the router.
Next
type quit to exit from tftp.
8.6.4
2.
From a PC/laptop. Startup the TFTP Client program on the laptop.
First
select the file from the directory on the PC/laptop [ by default the same directory
as the
TFTP
Client program ]. The source [ Local ] directory can be altered if required. Next type in
the
IP
address of the Router in the Remote Host window. Ensure that the Mode is set to ASCII
and
then
click the Right arrow button ŕ to put the file into the
Router, and click on the OK button to
start
the transfer.
9
Download
/ Upload using Dump
Note
the configuration can also be dumped into HyperTerminal, or any other suitable terminal
emulator.
For
HyperTerminal goto
Config
Access
set up
Dump
The
restore has not yet been fully tested.
10
CHASE
ROUTERS
Other
F.E.C.O ‘s will detail information on specific Chase models.
11
CHASE
ROUTER CABLE ADAPTORS
NOTE.
Chase provides different RJ45 to 9pin/25pin adaptors for connection of the Chase
Routers
to VDU’s, PC’s and Modems. These can be used with the appropriate cables for
connection,
but are DIFFERENT from the Cisco Router Connectors.
Only
use Cisco Adaptors on Cisco equipment and Cisco Adaptors on Perle/Chase equipment.
12
EDP
Cables & Adaptors for Chase Use
KH Chase IO-LINK-130 to
NTU
KJ
Chase IO-LINK-SOHO / 130 Console port to VDU
KK
Kilostream to NTU
KO
Chase Router Adaptor No markings
KT
Chase IO-LINK SOHO / 130 Console port to PC
KW
Chase IO-LINK 130 Kilostream port to SAME
Back
to Back V24/RS232
KX
Chase IO-LINK 130 Kilostream port to SAME
Back
to Back V35
13
Return to
Index